Defining the settings for a savepoint project
The settings for a savepoint project are divided into three separate tabs:
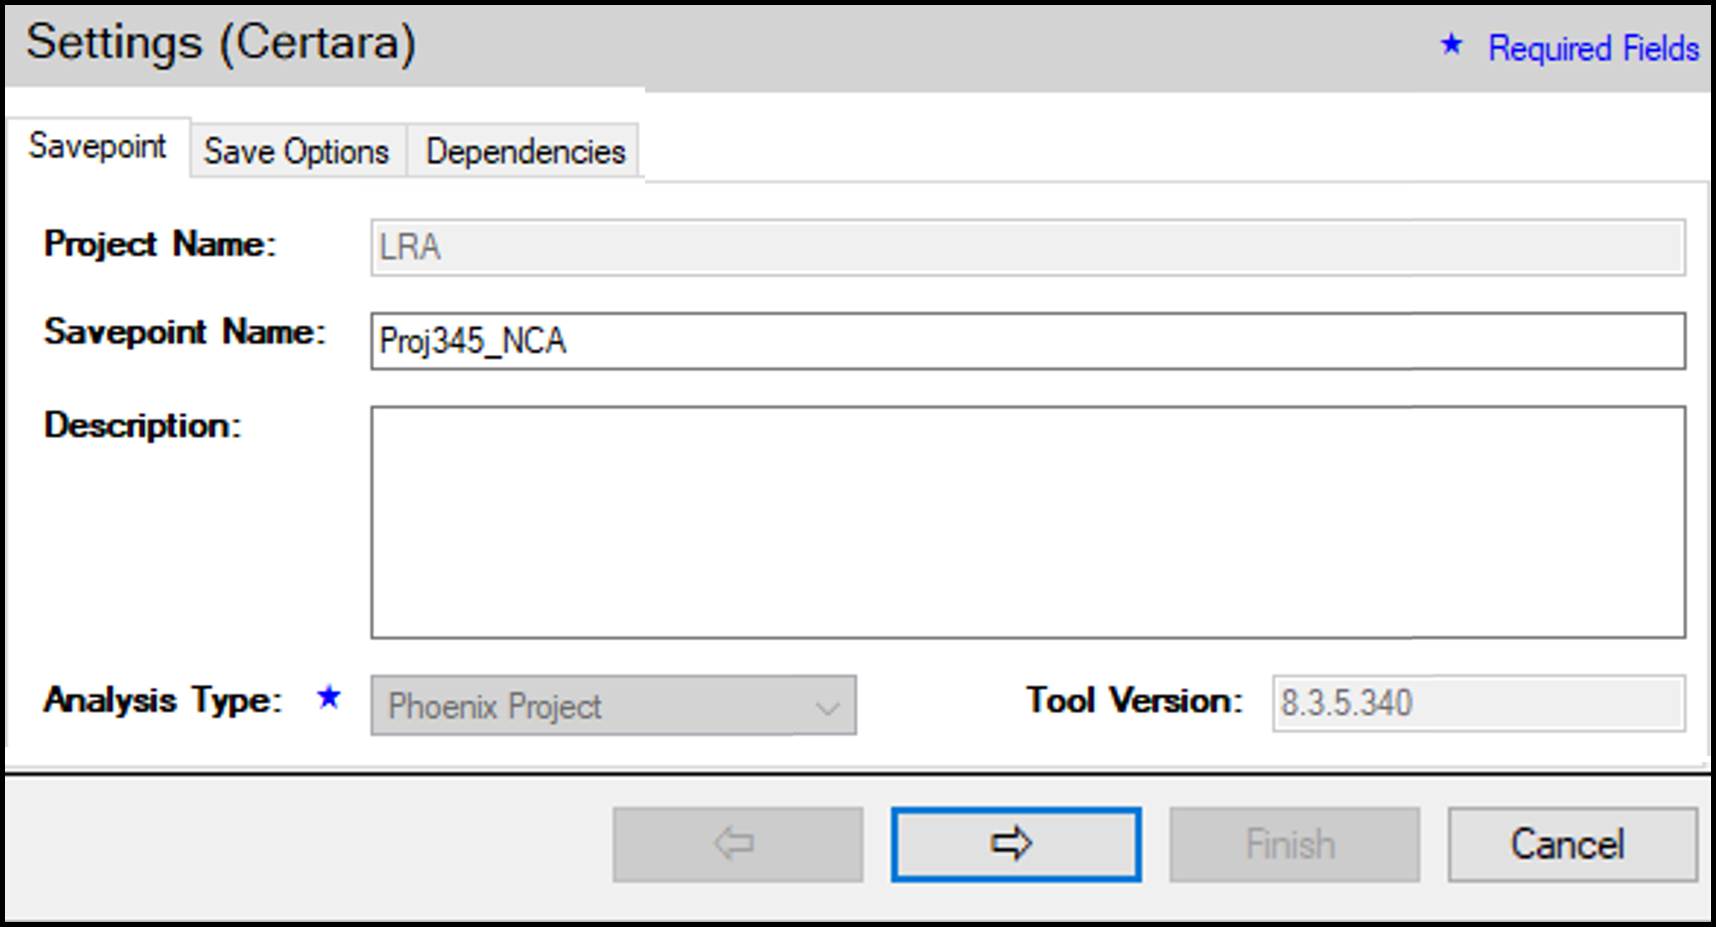
In the Savepoint tab, define the savepoint using the available fields and menus. The options available are set up by the administrator.
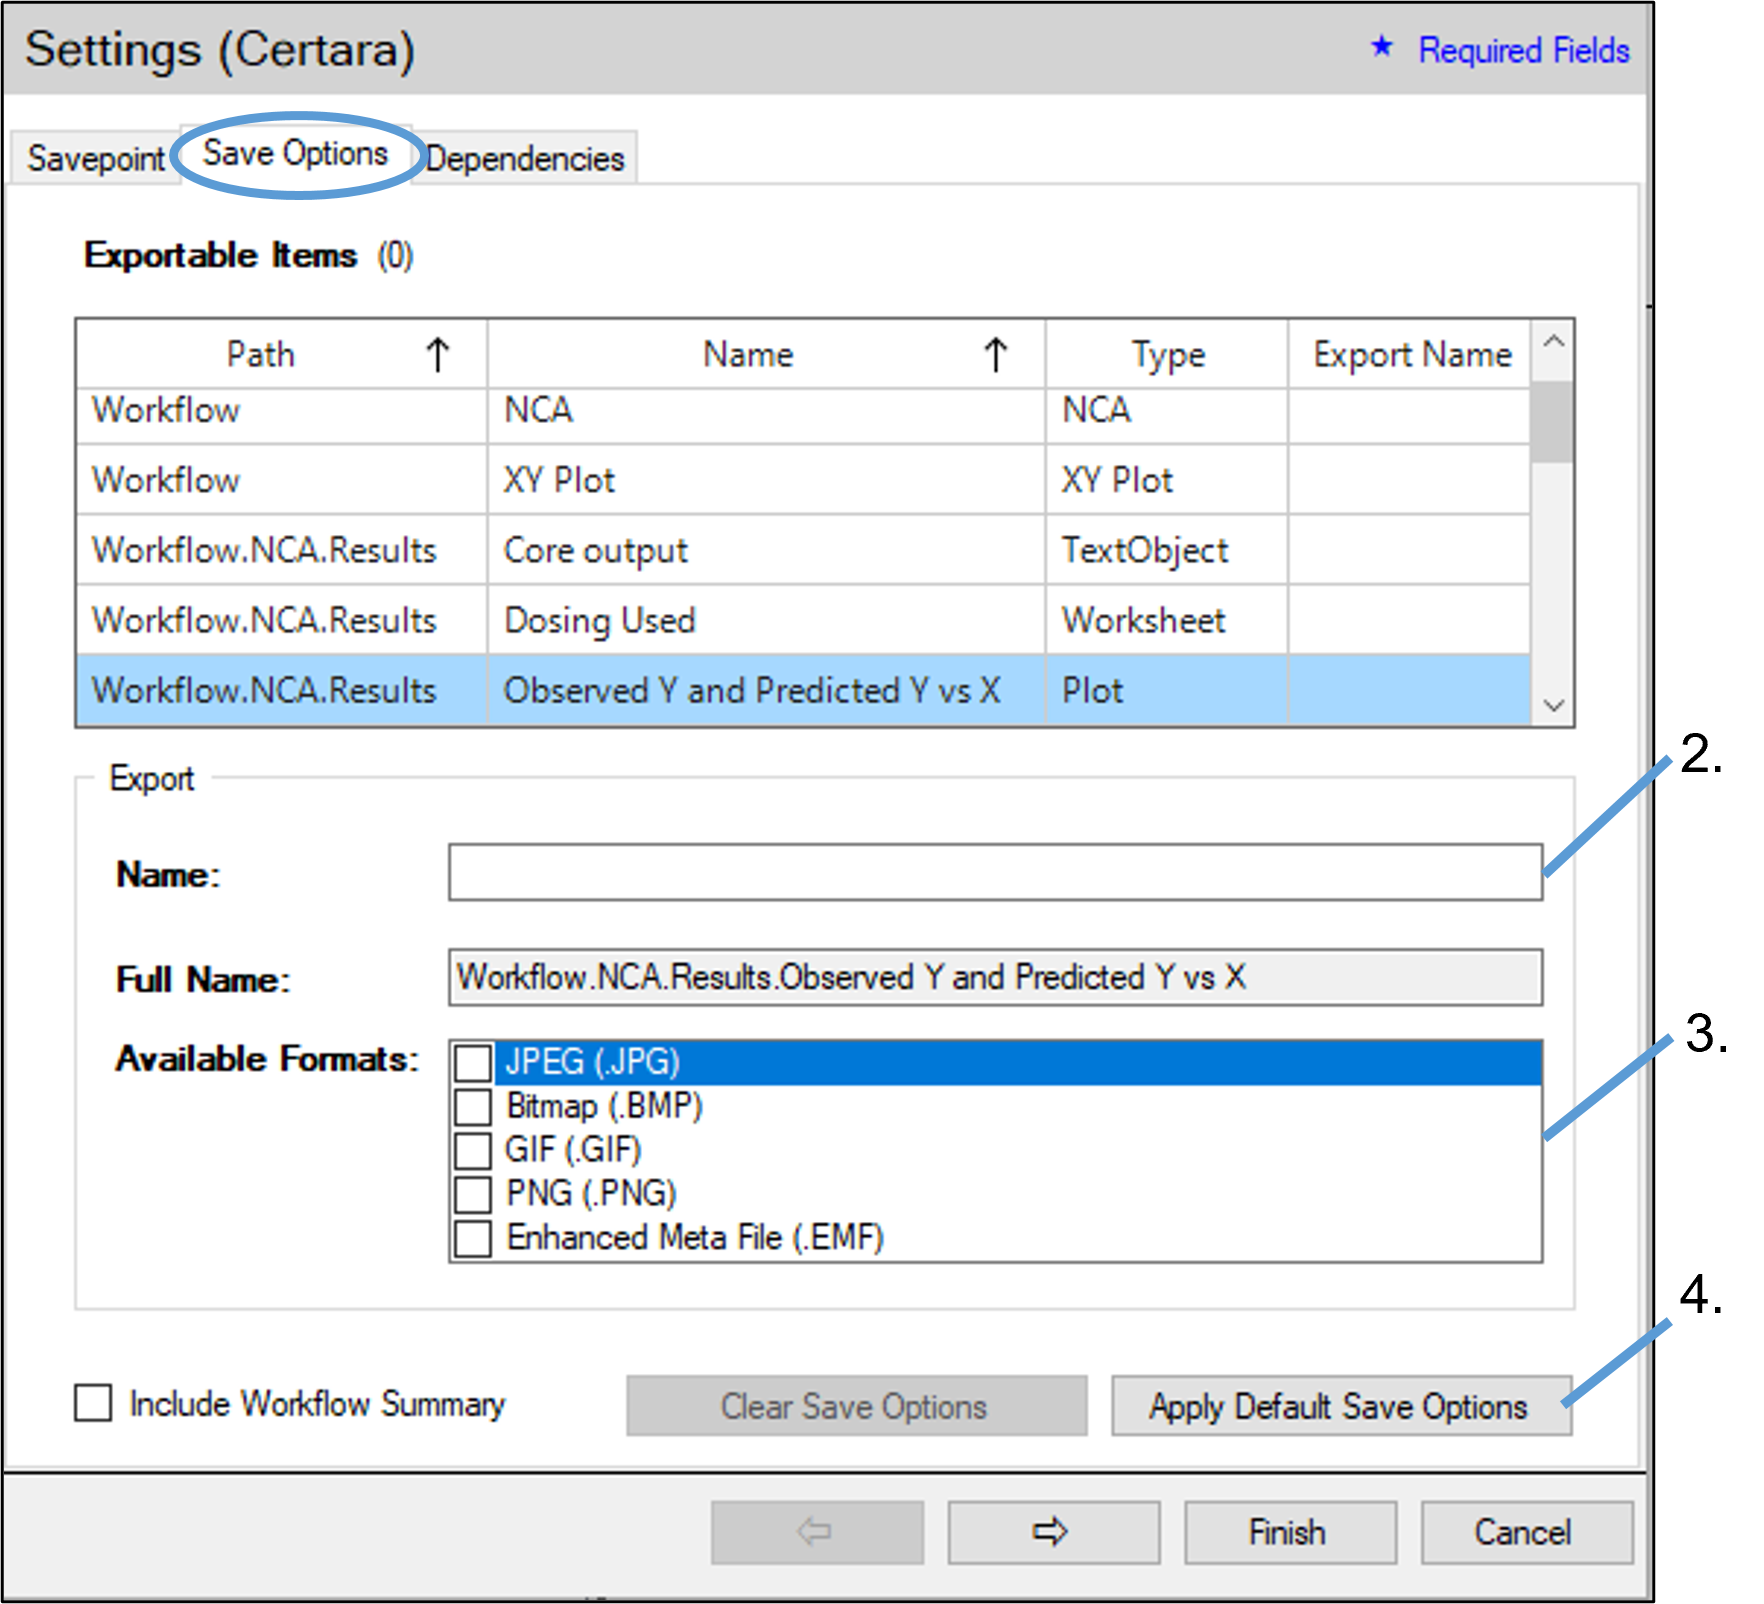
Click the Save Options tab to choose the project items to save to Integral and the formats.

In the Save Options Settings tab, each item available for export is listed.
If a name other than the one assigned by Phoenix (shown in the Full Name field) is to be used when exporting an item, select the item and enter the new name, using the Latin alphabet, in the Name field.
Note: When results have a similar Path, it is important to provide unique names for the export. Otherwise, the save will fail with an error message.
Select the format(s) in which to export the item by checking the box(es) in the Available Formats list.
Use the Clear Save Options button to remove any user-entered names or format settings. Use the Apply Default Save Options button to use the default settings for the data type of the selected item. See “Configuring default save options” for details on setting up default save options.
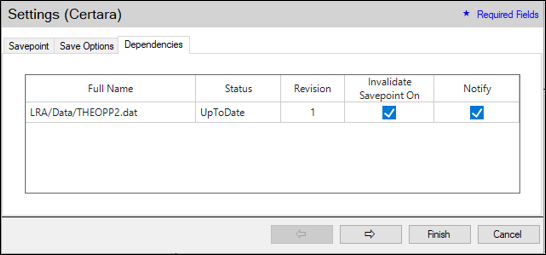
Click the Dependencies tab to set dependency tracking options.

Sub-folders and files in the selected savepoint container folder to which you have read access are listed in the Dependencies tab, along with their status.
Select the folders/files on which the savepoint project depends. (Note that selecting a folder selects all files within that folder.)
Checking the Invalidate Analysis On box for a dependency causes savepoints that reference the object to be marked as out-of-date (i.e., invalidated) when a different version of the object is saved to Integral. Clearing the checkbox will result in a savepoint not being marked out-of-date when a new version is saved to Integral.
Check the Notify box to send a message when the savepoint is invalidated.
Objects loaded from Integral into Phoenix projects will have their dependencies maintained.
After setting the savepoint properties, save options, and dependency customizations, press the right Arrow button to continue to the Confirmation page (see “Confirming changes”).
