This section includes information on the following topics:
Creating a worksheet or workbook
Adding columns to a worksheet
Editing an existing column
Adding and deleting rows in a worksheet
Moving cell values in a worksheet
Editing data values in worksheets
Replacing a cell value with a new value
Undoing and redoing actions
Changing the display format of numerical values
Finding a cell value in a worksheet
Sorting a worksheet
Using Edit in Excel
There are also a number of operational objects designed specifically for modifying worksheets. See “Worksheet-Related Objects”.
Creating a worksheet or workbook
To create a worksheet
Select File > New Worksheet ![]() (New Worksheet icon).
(New Worksheet icon).
Or right-click the Data folder and select New > Worksheet.
A new worksheet is added to the Data folder.
To rename the worksheet
Select the worksheet and press the F2 key.
Or single-clicking the worksheet name a second time.
Or right-clicking the worksheet and selecting Rename.
Type a name for the new worksheet.
To create a workbook
Right-click the Data folder and select New > Workbook.
Click the (+) sign next to the workbook to view the worksheets it contains.
To add more worksheets to a workbook, right-click a workbook and select New > Worksheet.
With the worksheet displayed, click Add under the Columns box in the Columns tab.
Or right-click in the worksheet itself and select Insert Column from the menu.
In the dialog, select the Numeric or Text option buttons to set the data type for the new column.
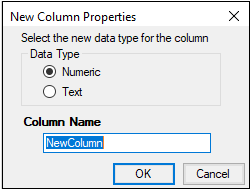
Type a name for the new column in the Column Name field and click OK.
After a column is added to the Columns box its properties can still be edited.
Numeric versus text
Numeric-type columns are considered by Phoenix to contain only numeric values, and the application treats the values in a numeric column as numeric data. A numeric column contains only numeric values or substitution values such as those applied by BQL rules.
Text-type columns in Phoenix can contain mixed numeric and text values. Some important considerations regarding Text-type columns include:
Any beginning and trailing spaces in text columns are trimmed in Phoenix worksheets.
Preceding “0”s will be lost in the case of numeric subject identifiers that start with “0”s.
Columns with numbers as purely text will sort differently than numeric columns.
Very large integers will lose precision due to rounding of significant digits when they exceed precision capacity (approximately 14 digits);
Limitations on column names
Limitations on column names are necessary in Phoenix because certain characters can cause operational objects to either work incorrectly or not recognize a column in a worksheet.
Use only alphanumeric characters and underscores.
No spaces. Spaces are converted to underscores.
Start with a letter. Column names that start with a number have an underscore added to the beginning of the column name.
Any invalid characters are automatically converted to an underscore. For example, if a user types the column name 1 Conc%, Phoenix automatically converts it to _1_Conc_.
To change the column header, click the name in the Columns box to make it editable and type the new name.
To remove a column, select a column header in the Columns box and click Remove below the Columns box.
Or right-click the cell or column header in the worksheet itself and select Delete from the menu. In the confirmation dialog, click the Selected Column(s) option button and click OK.
Note that columns cannot be deleted from a worksheet that is mapped to an operational object.
To change the order of the columns, select a column in the Columns box and click the Up Arrow and Down Arrow buttons beside the Column box to move the column up and down.
To change a column’s data type, click Change beside Data Type to display the Change Column Type dialog and select the type.
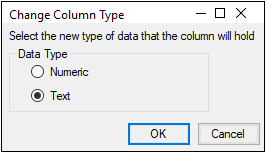
Caution:Changing a column from text to numeric deletes any non-numeric values in the column.
To add units to a column header, type the unit in the Unit field or click Units Builder to open the Units Builder dialog. See “Using the Units Builder”.
Adding and deleting rows in a worksheet
Right-click in the worksheet and select Insert Row from the menu.
If a cell is selected, the row is inserted above the selected cell. If multiple rows are selected, the same number of rows will be inserted above the first selected row.
To delete a row, right-click a cell in the row and select Delete from the menu. In the dialog, select the Selected Row(s) option button and click OK.
To move rows, select the contiguous rows, move the cursor over the lower right corner of the selected block of rows and, when the cursor changes to a four-arrow sign, drag the block of rows to the new location.
Note:A row-paste operation will only appear in the history when the data to be copied is selected by highlighting the individual cells and pasted by selecting the destination row number. If the data is copied by selecting a row number or pasted by selecting the destination cells, the history entry will not be created.
