Note:The ODBC user interface is only available when using the 32-bit version of Phoenix.
Phoenix can exchange data with Open Database Connectivity (ODBC) compliant databases such as Oracle and SAS. For example, Phoenix can read rows of PK data from an ODBC-compliant database, and save analysis output back to a table in that database. This is done using the ODBC import and export functionality in Phoenix.
This section contains the following topics:
Establishing a connection
ODBC import
ODBC export
The first step in an ODBC import or ODBC export is to establish a connection to a specific database.
Creating a new connection string creates a new connection string, defining the database type and location. This connection string may be saved as part of an import or export settings file for re-use.
Loading a saved connection extracts the connection string from a previously-saved import or export file. This establishes a link to the database, to be used with a new or saved query or export.
Creating a new connection string
To define the database type and location for ODBC import or export
Select File > ODBC > Import (or Export) > Legacy Wnl.
Select the Create a new Import (or Export) option button in the ODBC Import (or Export) dialog.
Click Next.
Select the Create a new connection option button and click Next.
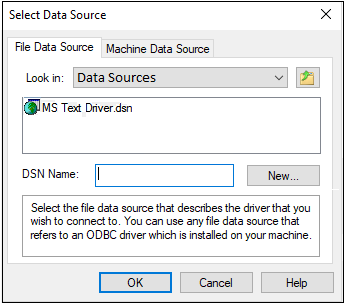
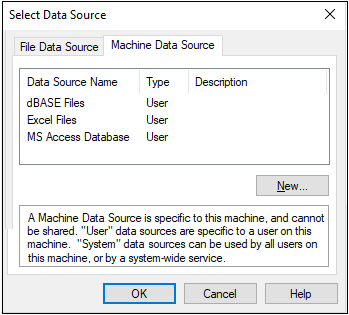
Click New to set up new File or Machine data sources or select a data source from one of the two tabs in the Select Data Source dialog. (See Microsoft Windows documentation for details on creating new data sources.)

The File Data Source tab lists all file Data Source Names (DSNs) and subdirectories on the system. These are file-based data sources that can be shared among all users who have the same ODBC drivers installed. The data sources do not need to be dedicated to a single user or local to a specific computer.

The Machine Data Source tab uses information stored in Window’s registry, which provides the majority of the connection string information.
Click OK.
If a log in dialog appears, enter the appropriate login ID and password for the data source and click OK.
ID and password are set up by the Database Administrator or Information Technology personnel.
A connection string may be saved along with a import query or export definition in an import (*.imp) or export (*.exp) settings file for re-use. This is done at the conclusion of building the import query or export definition. A connection string can also be saved by itself and loaded separately during the import/export setup process.
The next step is to set up a query (see “Specifying the Query”) to pull the desired data from the database, or create an export definition (see “Creating a new export”) to map Phoenix data columns to database fields.
Once a connection string is saved in an import (*.imp) or export (*.exp) file, it can be loaded for use with different import queries or export definitions.
Select File > ODBC > Import > Legacy Wnl or File > ODBC > Export > Legacy Wnl.
Select the Create a new Import (or Export) option button in the ODBC Import (or Export) dialog and click Next.
Select the Load an existing connection option button and click Next.
In the Open dialog, select the import file (*.imp) or export definition file (*.exp) containing the connection string for the desired database and click Open.
Proceed with the import or export, as detailed under “Specifying the Query” for imports or “Creating a new export” for export.
