This example demonstrates the general steps to prepare a CDISC dataset so that it can be used within Phoenix. The CDISC Data Preparer object produces analysis-ready datasets (SAMPLE and DOSE worksheets) in Phoenix, using CDISC formatted datasets as input. This example will also walk through submitting the output of the CDISC Data Preparer as input to an NCA object, which will be successfully executed.
There are steps common to many Phoenix objects (e.g., inserting an object, importing and mapping data to an object, and executing an object) and can be completed in multiple ways (e.g., main menu selection, right-click menu selection, drag and drop operation, etc.). For simplicity, only one mechanism is listed. Please refer to the Phoenix Functions chapter of the Phoenix Framework User’s Guide to familiarize yourself with the basic operations used in Phoenix and any alternative mechanisms available.
The sections in this example include:
Setting up the project and data
Setting up the CDISC Data Preparer object
Exploring the results
Mapping the results to an NCA model
Setting up the project and data
-
Create a new project named CDISC Prep Example.
The CDISC Data Preparer object is dependent on CDISC Navigator. The CDISC Navigator converts CDISC files, in SAS transport file format (.xpt), into Phoenix worksheets and verifies that the data conforms to the standards for the specified domain. Elapsed times are also converted from ISO format to numeric times in hours. -
Select File > CDISC > SDTM > Import.
-
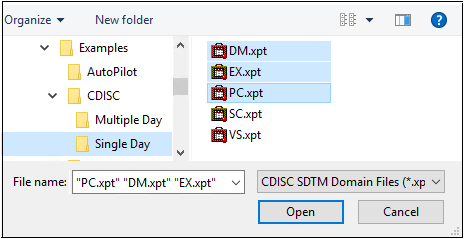
Import the DM.xpt, EX.xpt, and PC.xpt files from …\Examples\CDISC\Single Day.
-
Click Open.
The CDISC SDTM Import dialog is displayed listing any problems that were encountered during the import and data validation processes. -
Click Close.
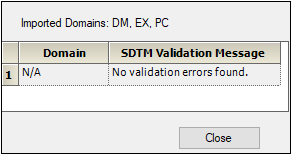
For this example, there were no errors.
Setting up the CDISC Data Preparer object
-
Select Workflow in the Object Browser and then select Insert > Data Management > CDISC Data Preparer.
-
Drag the DM worksheet from the Data folder to the Demographics Mappings panel to map it as the input source.
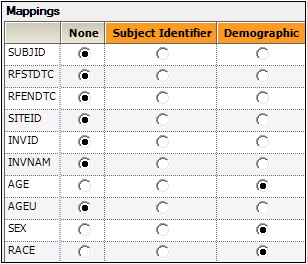
The columns are automatically mapped to the appropriate contexts:
– USUBJID to the Subject Identifier context.
– AGE, SEX, and RACE to the Demographic context.These are the columns to include in the output datasets. -
Select Exposure in the Setup panel list
-
Drag the EX worksheet from the Data folder to the Exposure Mappings panel.
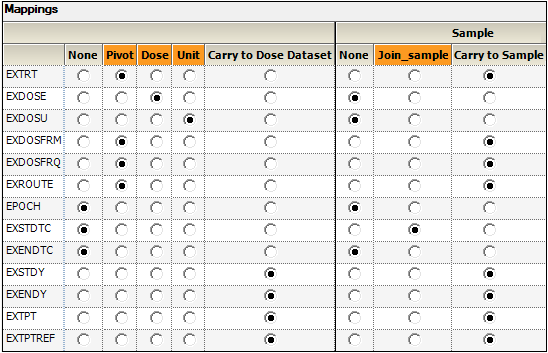
There are two mapping section in the Exposure Mappings. The first section specifies how exposure columns are treated when producing the Dose result dataset. The second section specifies which data columns from the Exposure domain are used to join to the Sample domain and which exposure columns to include in the Sample result dataset.
The columns are automatically mapped to the appropriate contexts: -
Select PK Findings in the Setup panel list
-
Drag the PC worksheet from the Data folder to the PK Findings Mappings panel.
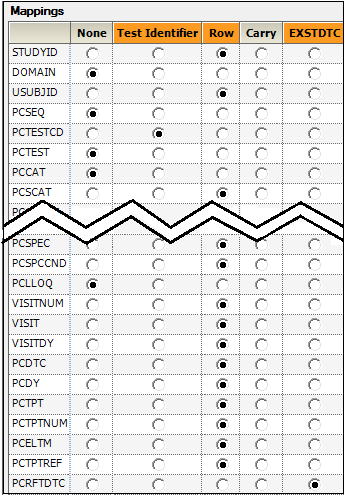
Most of the columns are automatically mapped to the appropriate contexts.
•EXTRT (Name of Actual Treatment),
EXDOSFRM (Dose Form),
EXDOSFRQ (Dosing Frequency per Interval),
EXROUTE (Route of Administration)
to the Pivot context.
These columns identify unique dose tests as defined in the Exposure tab.

•EXDOSE to the Dose context. This column contains the actual dose amount.
•EXDOSU to the Unit context. This column contains the actual unit of the dose amount.
•EXSTDY (Study Day of Start of Treatment),
EXENDY (Study Day of End of Treatment),
EXTPT (Planned Time Point Name),
EXTPTREF (Time Point Reference)
to the Carry to Dose Dataset context.
•EXSTDTC (Start Date/Time of Treatment) to the Join context. This column will be used to match up data in the PK Findings domain.
•EXTRT, EXDOSFRM, EXDOSFRQ, EXROUTE, EXSTDY, EXENDY, EXTPT, EXTPTREF to the Carry to Sample Dataset context.
This context enables sort keys to be specified between the dose and sample datasets during analysis.
PCTESTCD (Pharmacokinetic Test Short Name) to the Test Identifier context.
These columns are used to identify unique PK Findings tests. The unique tests are displayed in the PK Findings (Tests (PC)) tab in the properties.

STUDYID (Study Identifier),
USUBJID (Unique Subject Identifier),
PCSCAT (Test Subcategory),
PCSPEC (Specimen Material Type),
PCSPCCND (Specimen Condition),
VISITNUM (Visit Number),
VISIT (Visit Name),
VISITDY (Planned Study Day of Visit),
PCDTC (Date/Time of Specimen Collection),
PCDY (Actual Study Day of Specimen Collection),
PCTPT (Planned Time Point Name),
PCTPTNUM (Planned Time Point Number),
PCELTM (Planned Elapsed Time from Time Point Ref),
PCTPTREF (Time Point Reference)
to the Row context.
These are columns to include and represent the unique set of rows. All unique combinations of the Row and Join columns determine the number of sample rows in the result dataset.
Each column selected as a Join column in the EX domain will appear as a column mapping context for the PC domain. This allows specification of the columns in the PC domain that correspond to columns in the EX domain.
PCRFTDTC to the EXSTDTC context.
The PK Findings Tests(PC) tab on the Properties panel is used to select the tests to include, the layout, and the result columns to include in the result sample dataset.
In this example, the dataset only involves one test.
Do not change the default settings for the SYDN PK Findings test, which are.
Usage set to Include to include the test in the output.
Layout set to Stacked to have the results presented in a stacked format.
Result Column set to All to have all results columns included in the output that match the CDISC specification for results columns in original, numeric, or text format.
Continue to the next section.
