Refer to “Predefined Property Types” for a list of predefined properties by folder type.
To add a property
-
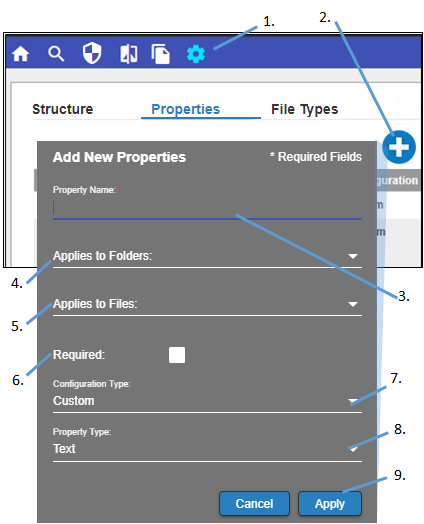
Click
 in the main toolbar.
 -
In the Properties tab, click
 below the list of properties.
 -
In the Add New Properties popup, enter the name by typing in the Property Name field.
-
In the Applies to Folders popup menu, check all of the folder types where this property is to be applied.
-
In the Applies to Files popup, check all of the file types where this property is to be applied.
-
Check the Required box to mark this property as required when adding folders of the type(s) specified in the Applies Folders popup.
If unchecked, the specified folders are able to be created without this property being defined. -
In the Configuration Type popup, select whether this property is to configured as a System or a Custom property.
-
In the Property Type popup, select interface mechanism to use for specifying the property value(s). Depending on the type selected, the Values field is displayed for entering all of the values from which users can choose for this property.
-
Click Apply.
To modify a property
Note:If a property has ![]() at the end of the row, it is locked and requires a password to edit or delete. See “Lock and Unlock Files”.
at the end of the row, it is locked and requires a password to edit or delete. See “Lock and Unlock Files”.
-
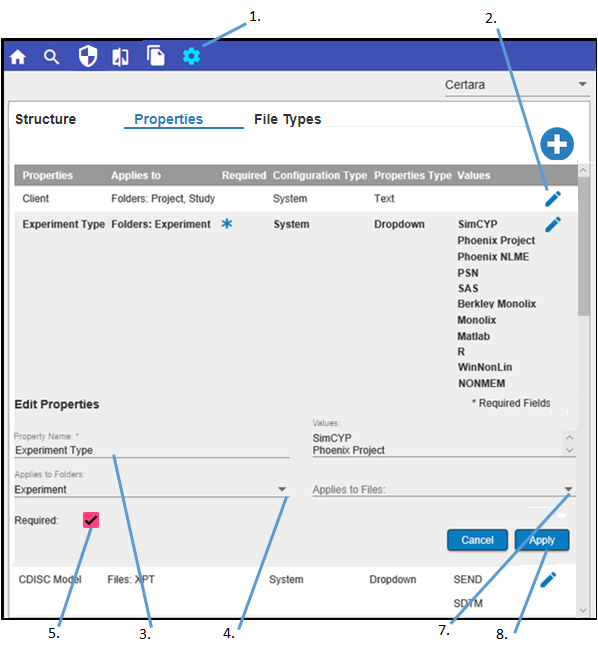
Click
 in the main toolbar.
 -
In the Properties tab, click
 next to the property to edit.
 -
In the Edit Properties expanded section, modify the name by typing in the Property Name field.
-
In the Applies to Folders popup menu, check all of the folder types where this property is to be applied.
-
Toggle the Required check box to switch whether this property is required when adding folders of the type(s) specified in the Applied Folders popup or not required.
-
In the Values field, modify the list of values from which users can choose for this property. The list is editable, just click and type.
-
In the Applies to Files popup, check all of the file types where this property is to be applied.
-
Click Apply.
