-
Select the model for which a VPC should be created.
-
Right-click the selected model and choose PsN other > Model diagnostics > vpc.
Or
Click in the toolbar and select Model diagnostics > vpc from the pop-up menu.
 -
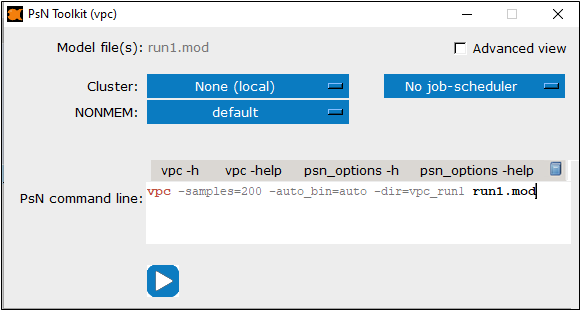
In the dialog, select the Cluster name on which to execute the VPC run from the pull-down.
-
Select the cluster type from the second pull-down.
-
Choose the NONMEM version from the pull-down.
-
Enter the command for creating the vpc in the PsN command line field.
The vpc command takes many arguments which alters the way the vpc is calculated, e.g. you can specify stratifications, binning, dependent variable etc. When entering arguments, make sure to separate them by a space and start each argument with a ‘-’.
Select one of the buttons above the field to view argument information:
vpc -h is shorthand help
vpc -help is expanded help
psn_options -h is the command to list all common PsN options
psn_options -help is the expanded list of all common PsN options
Click to view a history of the command’s usage in a separate dialog. You can select one from the list and press Use command to copy the command and arguments back to the PsN Toolkit dialog. In the PsN configuration file (psn.conf), a list of default arguments can be supplied as well, so commonly used arguments do not have to be repeated on the command line.
 -
When all arguments for the VPC dataset have been defined correctly, click
 to execute.
After successful completion of the VPC calculation, a new folder is added in the Pirana window list. If you do not see the folder, click ![]() to refresh the list (or right-click a selected model in choose Model > Refresh model info from the menu). Also, make sure that the folder filter is set to PsN folders or All folders.
to refresh the list (or right-click a selected model in choose Model > Refresh model info from the menu). Also, make sure that the folder filter is set to PsN folders or All folders.
