Models found in the project are listed in the model overview area, below the folders. By default, the models are ordered by run number. It is advised but not mandatory that models are named as a number (e.g., 001.mmdl), or prepended with run (e.g., run1.mod or run001.mod). If you are working with NONMEM models, refer to “NONMEM template control file syntax” for additional NONMEM-specific information.
When models are double-clicked, the model is opened in the code-editor (if an editor is specified in the Software integration page of the Settings dialog or in Pirana’s built-in NM-TRAN editor.
Model management features include:
Control overview model list
Batch editing of models
Open the input dataset
Attach folders to selected model
View difference with reference model
Export model items
Create zip file of model items
Delete a model
In addition, the following model-specific features are also available.
Duplicate model files — See “Duplicate NLME models” or “Duplicate NONMEM models”.
Rename model file — See “Rename an NLME model file” or “Rename a NONMEM model file”.
Several options are available for controlling what and how models are displayed in the overview area.
Condensed versus expanded mode — Click ![]() in the toolbar.
in the toolbar.
Or select the View > Condensed/Expanded view menu option.
In condensed mode, the model name, the last estimation method, and associated OFV (Objective Function Value) are reported in a single row for each model in the model list.
In expanded mode, the model name, all estimation methods, descriptions, and notes are displayed (see “Add notes and view model properties”).
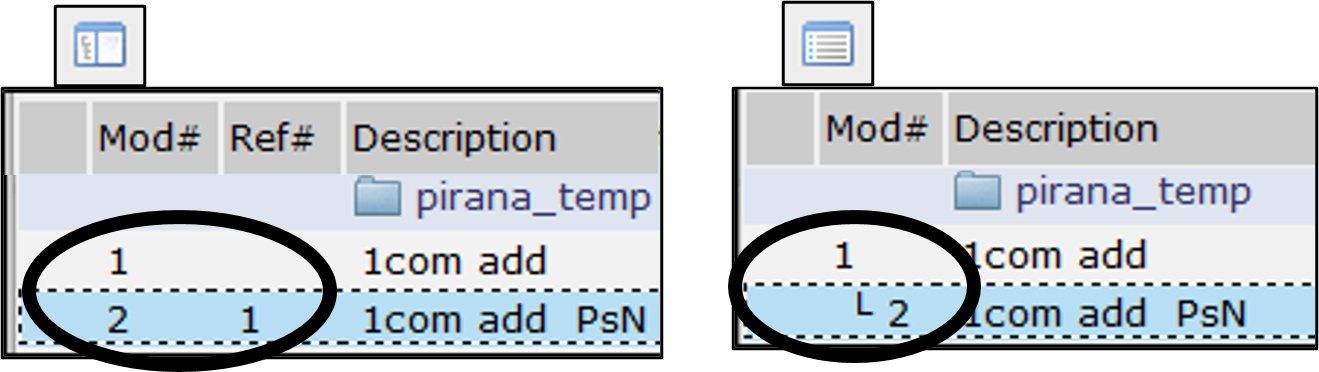
List versus tree view — Click ![]() . The icon changes to
. The icon changes to ![]() , indicating you are in tree view mode.
, indicating you are in tree view mode.
In tree view, model development is shown as a hierarchical tree. The tree is built using parent/reference information included in the model files (see “Run records”). When creating models in Pirana, this information is added automatically and adheres to PsN’s run record syntax.
Change columns displayed — Select the View > Columns menu option and check/uncheck the columns in the list.
Refresh model information — Click ![]() to refresh information for selected model(s). Always refresh when you update models and when a run is finished.
to refresh information for selected model(s). Always refresh when you update models and when a run is finished.
Hide and show models — Click ![]() to hide selected models.
to hide selected models.
Or select the View > Hide model(s) from overview menu option.
Or right-click the model and choose Model > Hide model(s) from overview.
An indicator in the toolbar shows the number of hidden models  .
.
To show hidden models, click ![]() .
.
Or select the View > Unhide models menu option.
Or right-click a selected model and choose Model > Unhide models.
Filter model list
By file extension: Select the extension from the pulldown next to filter the list. List of extensions is controlled by the Settings dialog (File type settings page). 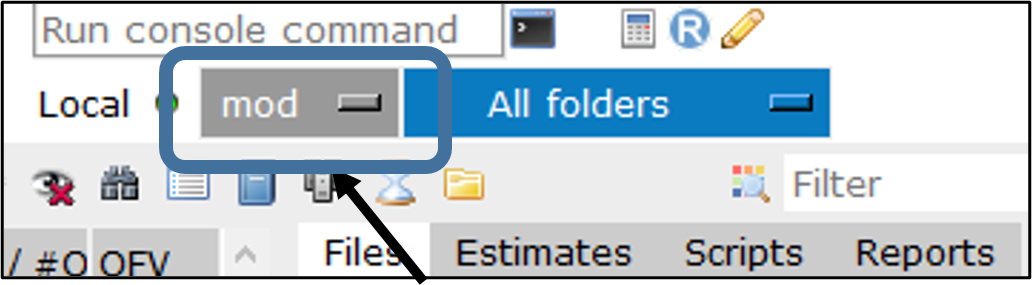
By folder: Use the pulldown to list only models in certain folders.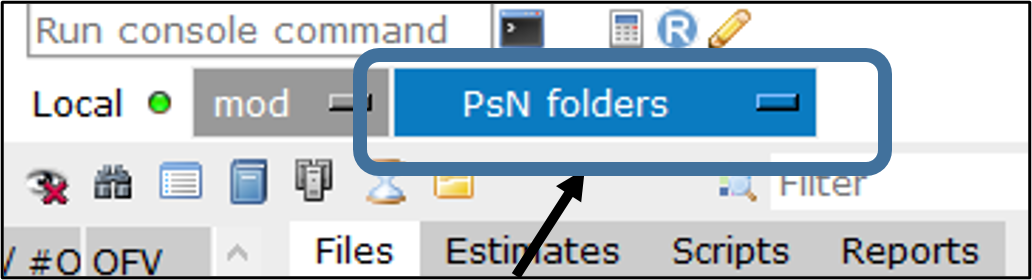
By text: Enter text to match in the Filter field. Both folders and models are filtered.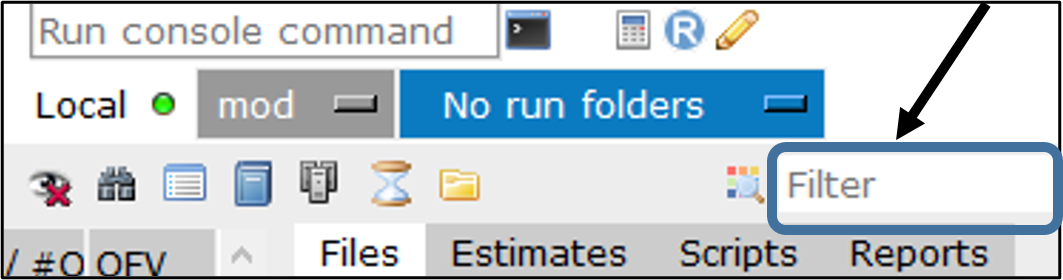
By color: Click ![]() (next to Filter field), select Show/Hide by color, and the color on which to filter. Select Show all to remove any applied filtering by color.
(next to Filter field), select Show/Hide by color, and the color on which to filter. Select Show all to remove any applied filtering by color.
Identify models and results by color — Select models/results, click ![]() , and choose the color.
, and choose the color.
Or right-click a selected model/result, select Colors & flags, and choose the color.
Colors could indicate, e.g., key runs, good runs, or bad runs. The meaning is up to you.
Note: The color information is stored in a database file (pirana.dir), which is created automatically in each folder that holds models and is visited by Pirana. If you archive your projects manually, make sure to include these files as well.
Flag models and results — Select models/results, click ![]() , and choose the flag.
, and choose the flag.
Or right-click a selected model/result, select Colors & flags, and choose the flag.
The meaning of the flag is up to you.
Pirana supports batch processing of editing models.
Select the Tools > Batch operations menu option.
Or click ![]() in the toolbar
in the toolbar
Choose the operation to perform from the menu.
Search and replace in models: Replaces a given search text (Search for field) with another string or block of text (Replace with field) in the selected models (Models list).
Change dataset: Replaces the dataset with a different dataset (New input dataset field) in the selected models (Models list).
Replace block: Replace a whole block of code (Find block menu) in selected model files (Models list) with new code (and replace with field).
For example, replace the $DATA block if you want all model files to use a different data file or the $THETA block if you want to use other initial estimates.
Add code to models: Add lines of code (Code field) at the end of selected models (Models list).
Add code to blocks: Add lines of code (and add this code field) to a specific block (Find block menu) in the selected models (Models list). The list of blocks in the Find block pulldown is different for NLME models and NONMEM models.
Right-click a selected model and choose Model > Open input dataset.
The input dataset associated with the model will open as an Excel spreadsheet.
Attach folders to selected model
To attach one or more folders to a model, creating a connection to the model (e.g., attached folders are highlighted in the list when the model is selected). Later, the folder can be managed in conjunction with the model (e.g., when the model is archived or deleted, the attached folders are also archived or deleted).
Click ![]() in the toolbar.
in the toolbar.
Or select Tools > Attach folders to selected models.
Or right-click a model and select File action > Attach folders to model(s).
Select one or more folders to attach.
For NONMEM models, check the Only show PsN folders to filter the list on the left.
For NLME models, the checkbox is labeled Only show NLME folders.
Click ![]() to add the folders to the list on the right.
to add the folders to the list on the right.
Use ![]() to remove a folder from the list.
to remove a folder from the list.
Press Save & Close.
View difference with reference model
Pirana provides a tool to show code differences, similar to the diff functionality on Unix systems. If one model is selected and the diff tool is activated, Pirana will show the difference between that model and the reference mode (if specified). If two models are selected, Pirana will show the code differences between the two selected models.
Right-click the selected model and choose Model > Code difference between models.
Or select Results > Run reports > Difference with reference model.
Press Save to HTML to generate an HTML file from the differences report.
To export files and folders from selected models:
Right-click a selected model (may have multiple selected) and choose File actions > Export to (sub)folder.
Or click ![]() in the toolbar.
in the toolbar.
Check the boxes for the types of items to export.
The Selected files/folders list will highlight the items as you check the boxes.
In the To folder field, enter the destination folder’s full path (click ![]() to browse).
to browse).
In the Action pulldown:
Select Copy to create a copy of the items in the new location.
Select Move to move the items to the new location.
Press Export.
Create zip file of model items
As a last step in model development, you may want to bundle the final model file, the associated result files, any attached folders, output files, and VPC folder into a zip file.
Right-click the selected model and choose File actions > Compress to zipfile.
Check the boxes for the types of items to include in the compressed file.
The Selected files/folders list will highlight the items as you check the boxes.
In the To folder field, enter the destination folder’s full path (click ![]() to browser).
to browser).
Press Compress.
Right-click the selected model (may have multiple selected) and choose File actions > Delete.
Or select Models > Delete model(s) from the main menu.
Or click ![]() in the toolbar.
in the toolbar.
Or press the keyboard button DELETE.
Check the boxes for items associated with the models that you wish to delete.
Note: If you have selected one or more folders in the main overview to be deleted, the Folder option should be checked to delete these as well.