Identify trough profiles and samples
Marking trough profiles
The Profiles table has a Trough column for identifying profiles with a trough sample. Checking the box in the Trough column marks the profile and all associated samples as trough.
Using filters to find trough profiles
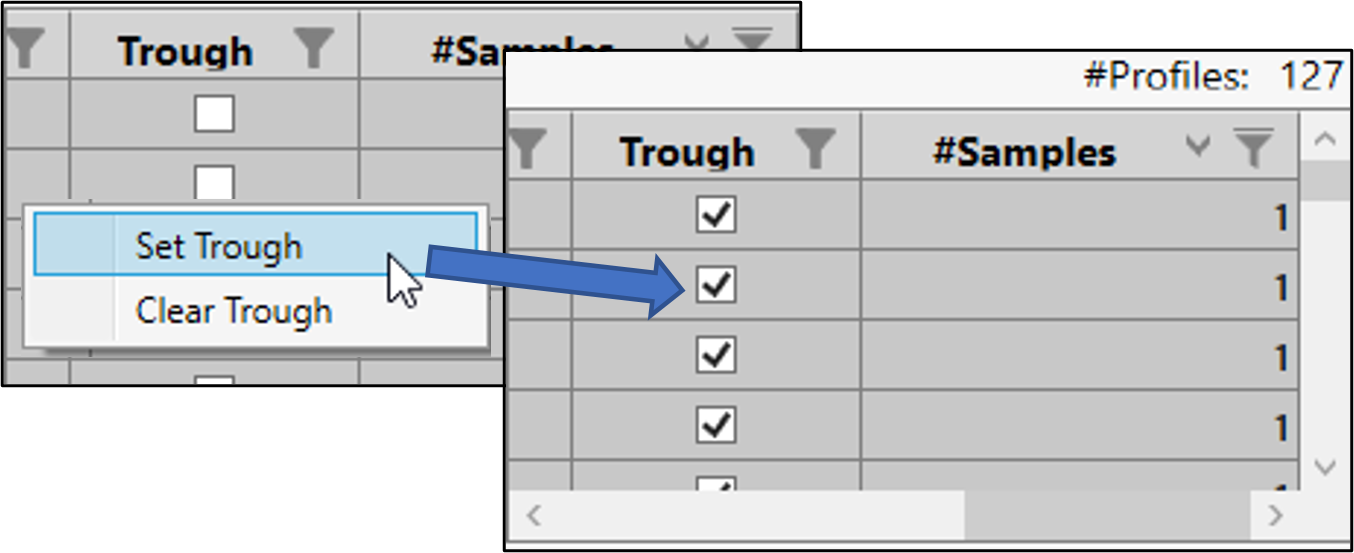
Typically, profiles that only have one sample are likely to be a trough. By applying a filter to the #Samples column and using the right-click menu, all of the profiles with one sample can be marked as trough. Here are the steps:
Select ![]() in the #Samples column header.
in the #Samples column header.
In the popup, click (Select All) to clear all check boxes, then check the box for 1 and click OK to only display profiles with 1 sample.
Press Ctrl + A to select all displayed rows.
Right-click a row and select Set Trough, which will check the boxes of all displayed rows.
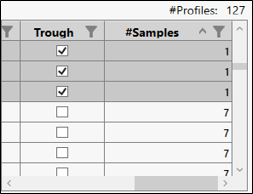
Verify that only rows with 1 sample have the Trough boxes checked:
Select ![]() in the #Samples column header again.
in the #Samples column header again.
In the popup, select Clear Filter.
Scroll down the table to find the unselected rows.
The unselected rows are those that were not part of the filter. Note that the Trough boxes for these rows are unchecked and that they have more than one sample.
Marking trough samples
In some cases, not all samples in a profile are trough. Individual samples can also be identified as trough using the Profile Data table.
In the Profile Data table, select one or more sample rows.
Right-click a selected sample row and choose Set Trough.
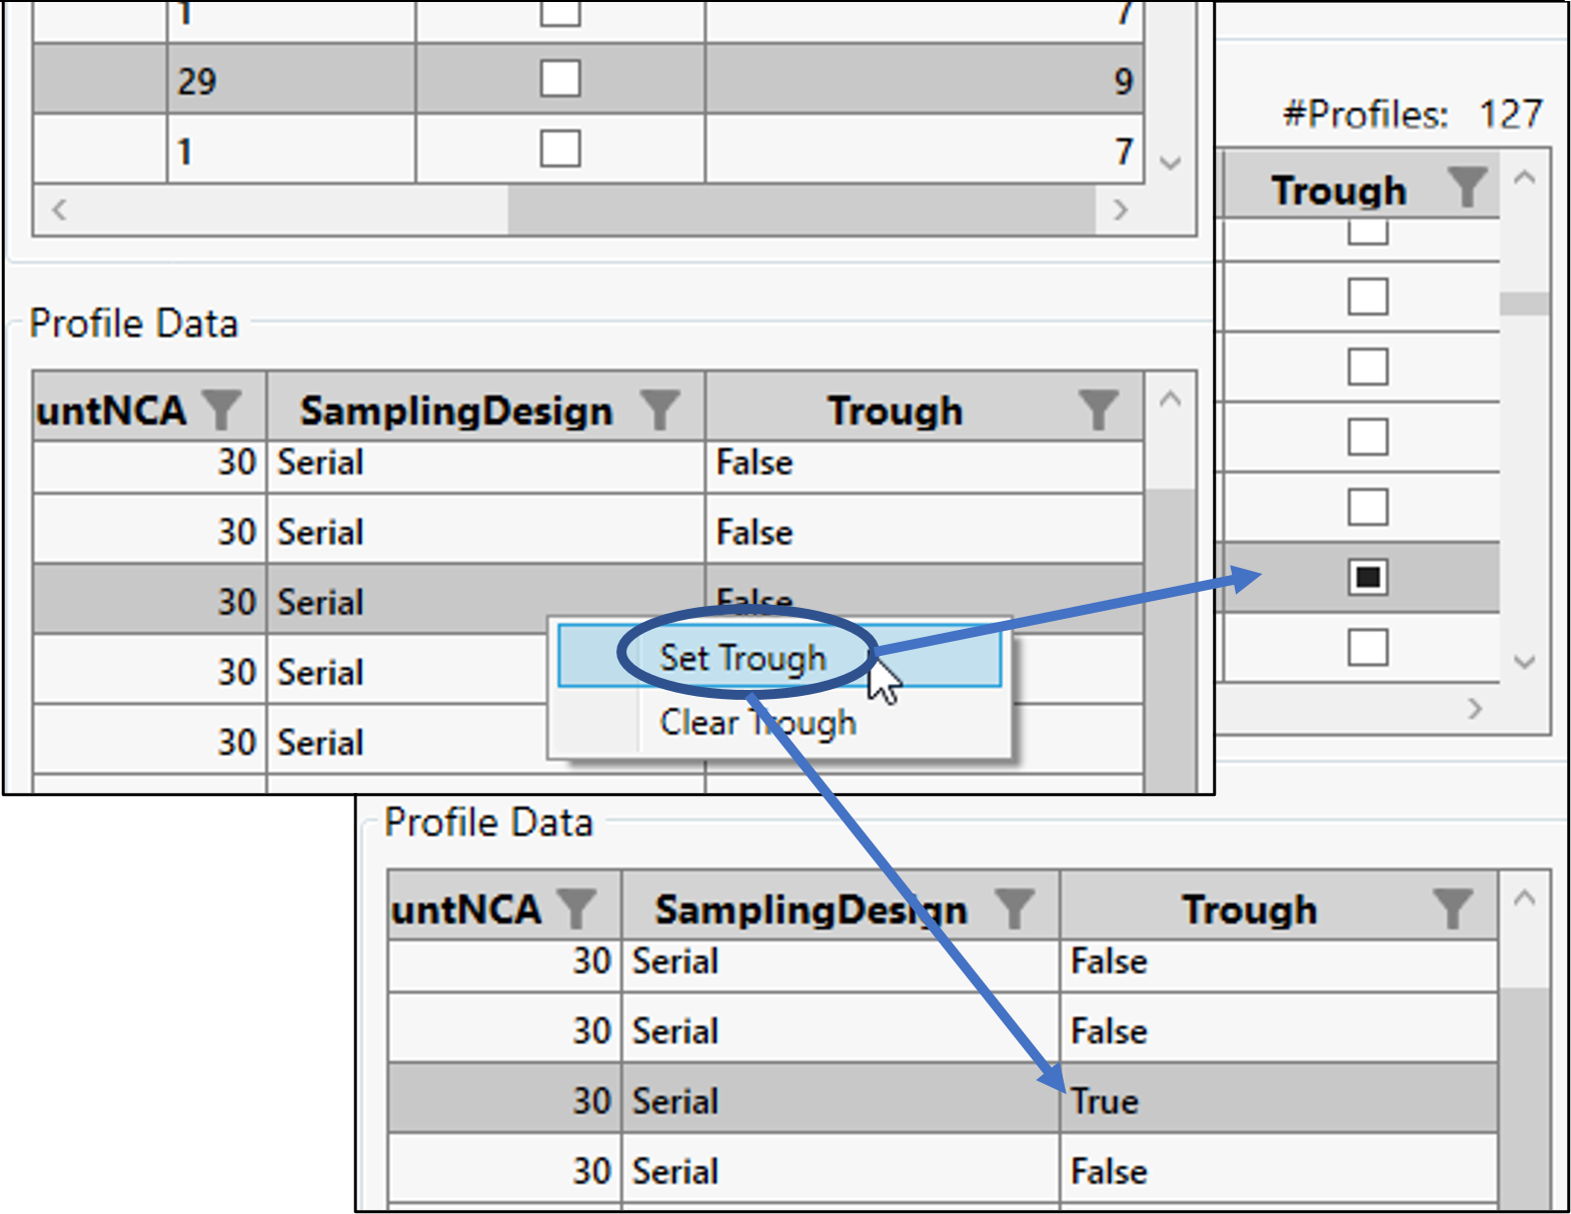
The cell in the Trough column of the Profile Data table changes from False to True and the box in the Profiles table changes from empty to filled in.