Phoenix can import datasets from files in .csv, .dat, .xpt (uncompressed), .sas7bdat (uncompressed), .xls, or .xlsx format. During the import process, a copy of the data is created. The original dataset file, no matter where it is located, is not altered by Phoenix in any way.
The maximum worksheet size Phoenix can import depends on the amount of RAM in the computer running Phoenix.
The following topics are discussed in this section:
Using the File Import Wizard dialog
See “Watson Import” for another data importing option.
Note: When subject IDs with many digits are imported (e.g., 100010901), they are changed upon import to G8 format by default (e.g., 1.0001090E-08), even if they are imported as text. Using the G9 format preserves the subject ID digits. See “Set Microsoft .NET format string” for more information on numeric formats.
Using the File Import Wizard dialog
Options in the File Import Wizard dialog control how a dataset is imported into Phoenix. The File Import Wizard dialog is displayed when importing .csv, .dat, .xls, or .xlsx files.
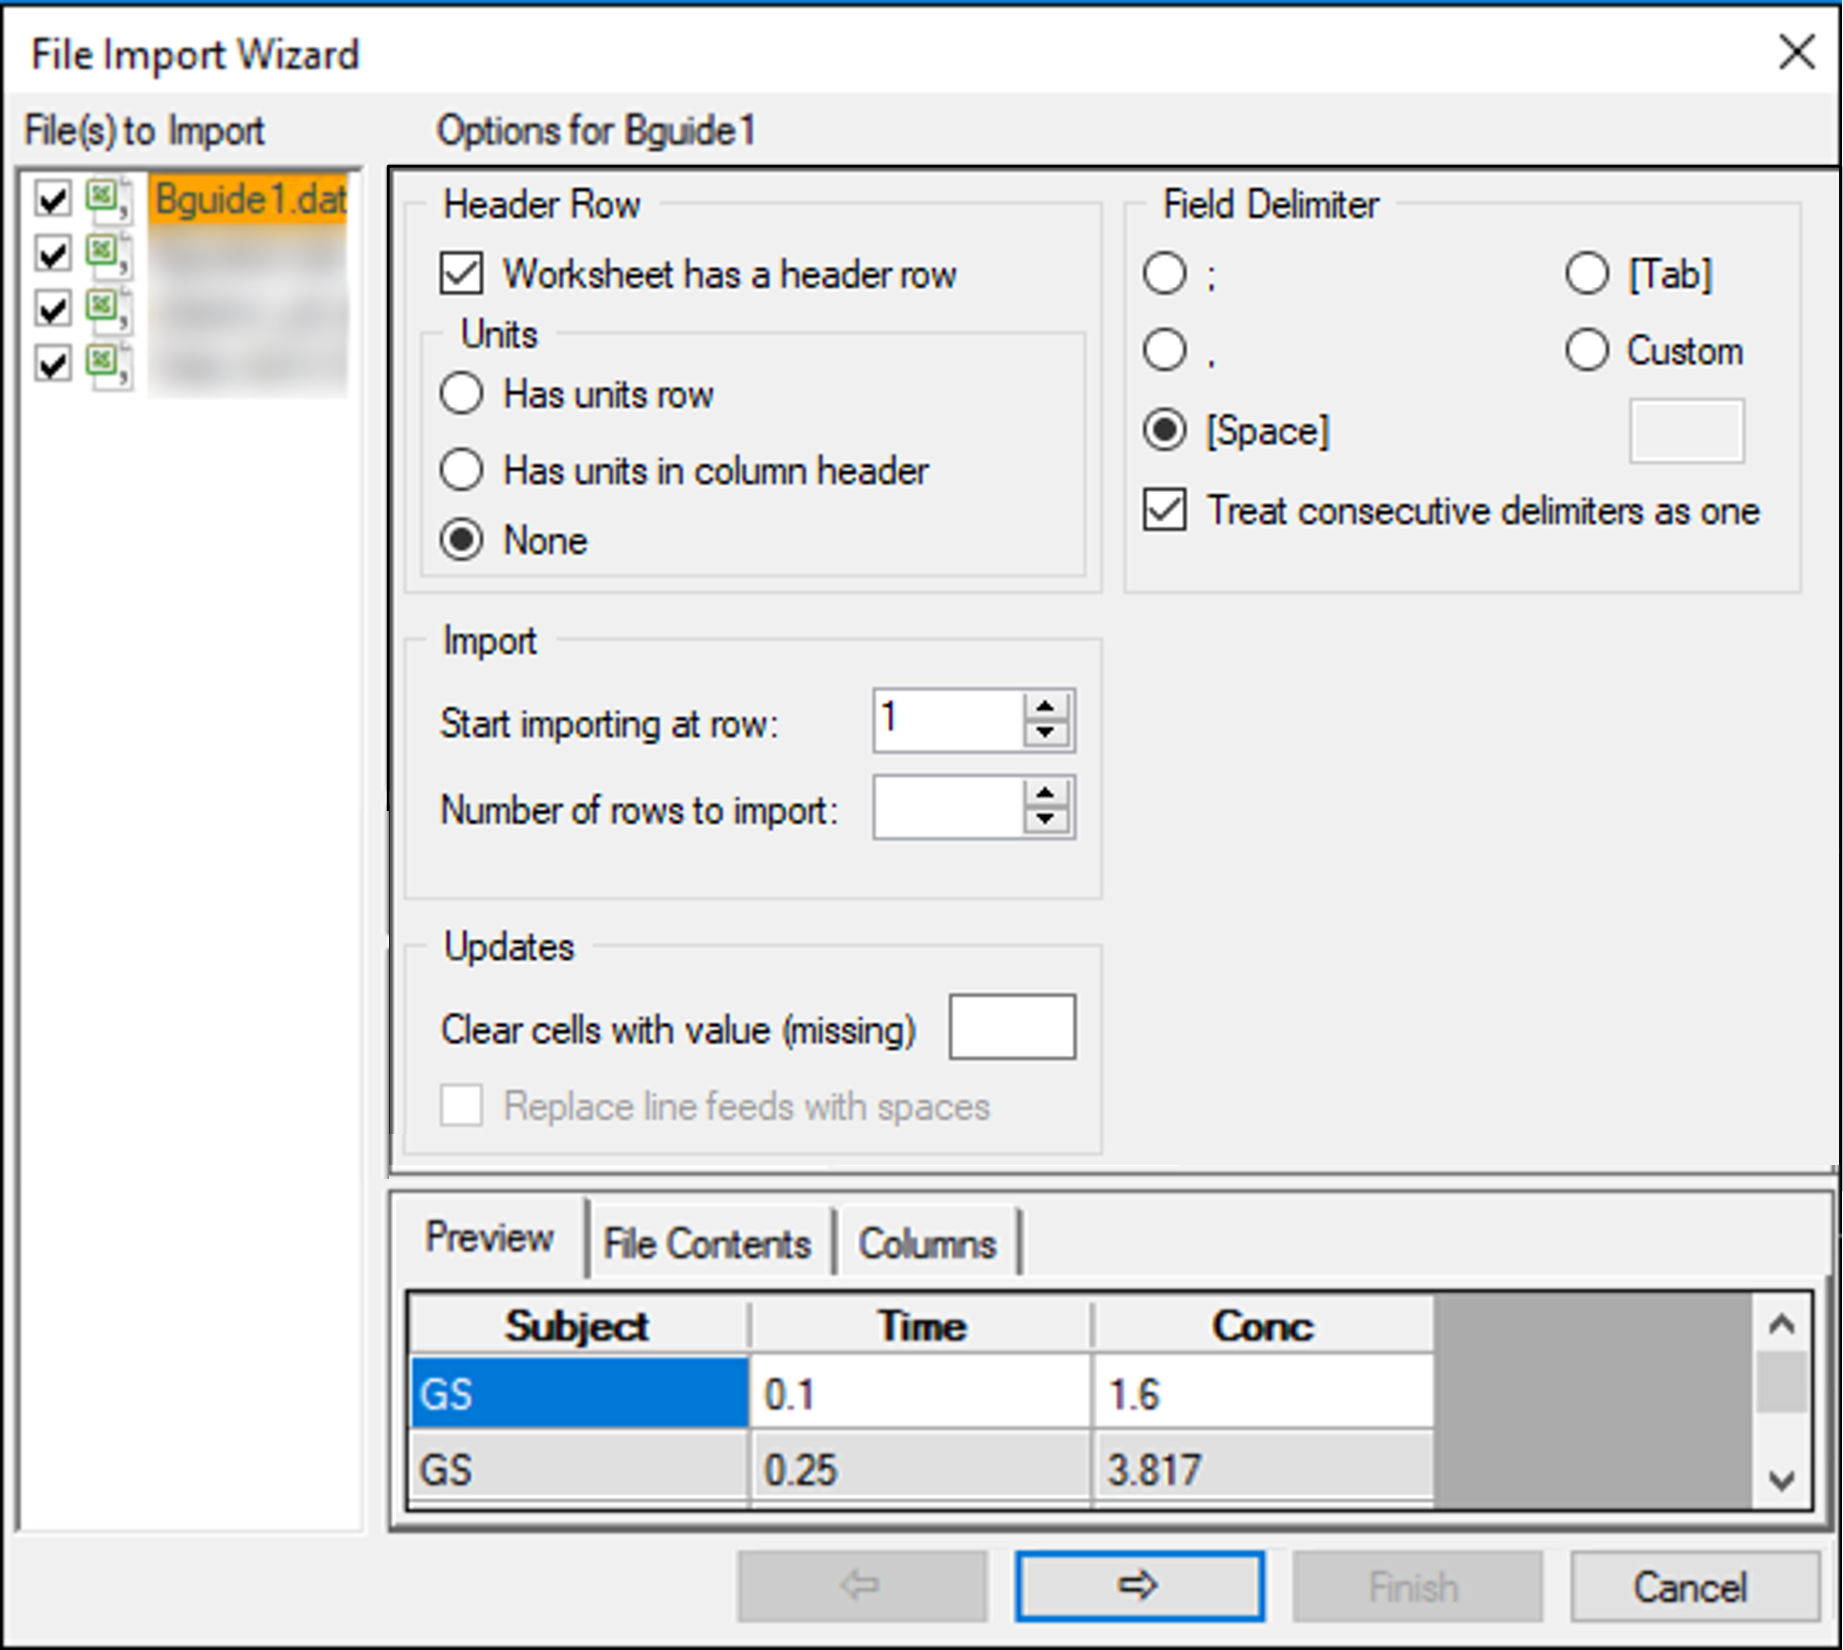
Check the box(es) in the left list for the file(s) to import. Unchecked items will be ignored during the import.
Select a file in the list to view import options available for that file.
Depending on the type of file, the following options may be available:
Header Row
Check the Worksheet has a header row box if a worksheet contains column headers.
Units: Indicate if units are included in the worksheet and their location, if present.
Select Has units row if a worksheet contains unit information in a separate row,
Select Has units in column header if at least one of the columns in the worksheet has units included in the header. If checked, any characters that are after an underscore (_), within brackets ({}), or within square brackets ([]) in the source file will be considered as units for the column.
Select None if there are no units in the worksheet.
Field Delimiter
Select the delimiter used in the dataset to separate the fields: colon, comma, space, tab, or a custom delimiter.
Check the Treat consecutive delimiters as one box to have Phoenix treat two spaces, for example, as one space.
Import
Type the row number where importing is to start in the Start at row field. The default value is 1.
In the Number of Rows to Import field, type the total number of rows in the dataset that are to be imported.
Updates
If the dataset has a specific entry for instances where the value is missing, type that entry in the Clear cells with value (missing) field. Any cells that match that entry will be left blank when imported. For example, a dataset may contain the word “None” in cells where a value is not available. Typing None in the field will import cells that contain the word “None” as a blank cell.
If line feeds are detected in the worksheet, the Replace line feeds with spaces checkbox becomes available and checked by default (the default is unchecked for History worksheets). This allows datasets with line feeds to be imported in a format that is usable by Phoenix tools and able to be saved and reloaded without issues. (Note that the checkbox does not apply to line feeds at the beginning or end of cells, which are always trimmed prior to the File Import preview.)
Preview the first 20 rows of data being imported, based on the currently selected options, in the Preview tab.
Select the File Contents tab to view the first 20 rows of the raw file contents.
Select the Column Options tab to specify the data type of a column (Numeric or Text) and indicate any columns of data to ignore during the import (check the boxes in the Ignore column).
Note: The file import wizard will scan the first 200 rows of the worksheet to determine the data type of the columns and if line feeds are present. Carefully review the imported dataset to verify the correct data type assignment and line feed detection.
The presence of non-numeric data in a numeric column can cause the type to switch to text. If this occurs, change the column type back to numeric.
Special characters in a .csv file may import incorrectly. If this occurs, save the .csv file as an Excel file and then import the .xls file.
Press Finish to import the file and display it in the viewing panel.
Or
Click Cancel to cancel the file import.
Phoenix file imports are controlled by the file extension. The extension determine where the file and any components are placed. The Custom Import menu forces a file to be imported as a binary, ASCII, or text file, without regard to the file extension. This menu is useful for importing file types that are recognized by Phoenix but do not contain data that is usable by Phoenix (e.g., attaching an Excel table to a project). By selecting File > Custom Import > Binary File the Excel file is placed in the Documents folder, and not in the Data folder.
Additionally, the Custom Import menu provides a way to import data for use with any of the third-party objects (e.g., R, SAS, PsN, etc.) as a shortcut.
Menu options include the following:
Binary File: Imported binary files are placed in a Documents sub-folder named after the imported file’s extension. For example, an imported .jpg file is placed in Documents/jpg. These files cannot be viewed or used in Phoenix. This menu option is best used to keep files in a project that are associated with a project but are not used directly in a project.
ASCII Data: Imported ASCII files are placed in the Data folder.
Plain Text: Imported text files are placed in the Code folder.
Shortcut: A shortcut object containing meta information about the selected file is added to the Shortcuts folder.