Select the Results tab of any executed operational object.
Select any worksheet, text, or plot in the Results tab.
Click ![]() (Print Results icon).
(Print Results icon).
Or
Right-click the item and select Print.
In the Print dialog, select a printer, the number of pages and copies to print, and press OK.
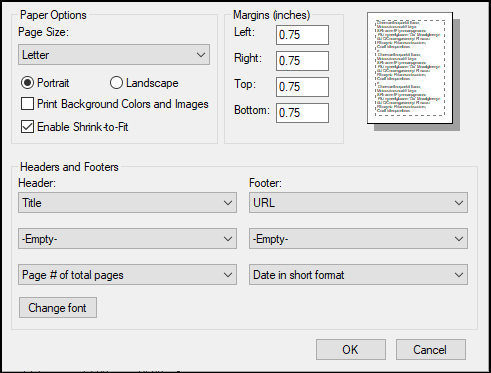
If the output table from the Table object is selected, the Page Setup dialog is displayed before the Print dialog.

Select the Page Size from the menu.
Choose the page orientation as either Portrait or Landscape.
Check the Print Background Colors and Images box to include those items in the print.
Check the Enable Shrink-to-Fit box to reduce the table size, if necessary, until the entire table fits on one page.
Enter the size of each page margin (in inches).
In the Headers and Footers section, use the three menus on the left to choose the information to display on the three lines of the page header.
Use the three menus on the right to choose information to display on the three lines of the page footer.
Press the Change font button to display the Font dialog for adjusting the font family, style, size, and color of the header and footer.