Using shortcuts with the PsN Shell object
The completed project (Ex02_PsN_ExecuteWithShortcut.phxproj) is available for reference in …\Examples\PsN.
Set up the project and data
The example control file is set up to look for the dataset source in C:\temp, so do either of the following:
Copy the THEOPP file from the …\Examples\PsN\ExampleWithShortcut folder to C:\temp.
Or
Edit the model_file_with_shortcut.ctl file, if another location is desired.
Create a new project named Ex02_PsN_ExecuteWithShortcut.
Right-click Workflow in the Object Browser and select New > External Software > PsN Shell.
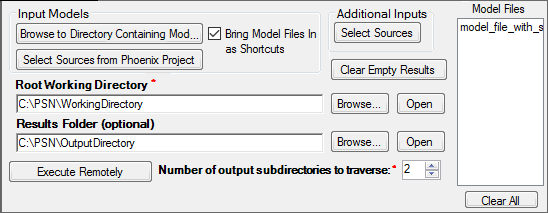
In the Options tab, check the Bring Model Files in as Shortcuts box.
Press Browse to Directory Containing Model Files, select …\Examples\PsN\ExampleWithShortcut, then press OK.
A link to the model_file_with_shortcut.ctl control file is added to the Shortcuts folder in the project and a new item appears in the Setup list: model_file_with_shortcut.
Specify the Root Working Directory, if needed.
You must have write permission for the selected folder.

Execute the PsN Shell object
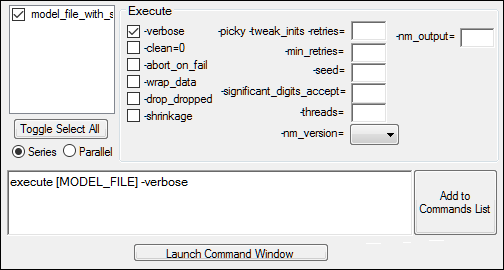
1. Select the Execute tab and build a command.
a. Make sure the model_file_with_shortcut box is checked in the model list.
b. Check the -verbose checkbox.
2. Press Add to Commands List.

3. Execute the object.
This concludes the “Using shortcuts with the PsN Shell object” example. You may save the project or close it.