PsN Shell object setup and execution example
The completed project (Ex01_PsN_Execute.phxproj) is available for reference in …\Examples\PsN.
Set up the project and data
Create a new project named Ex01_PsN_Execute.
Import THEOPP.dat and the PsN control file psn.ctl from …\Examples\PsN\Example1.
In the File Import Wizard dialog, click Finish.
The THEOPP file is added to the project’s Data folder and the psn.ctl control file is added to the Code folder.
Set up the PsN Shell object
1. Right-click Workflow in the Object Browser and select New > External Software > PSN Shell.
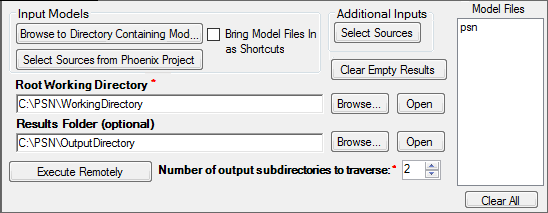
2. In the Options tab, press the Select Sources from Phoenix Project button.
3. In the Select Sources dialog, expand the Code folder, check the psn box, and press OK to specify the input model.
4. Select THEOPP in the Setup list.
5. Drag the dataset THEOPP from the Data folder to the Mappings panel.
6. Specify the root working directory by typing the path to the desired folder in the Root Working Directory field or use the Browse button.
This will already be filled in if you entered a path in the PsN Preferences dialog (see the “Setting up preferences” section). PsN will create run directories for each command executed (i.e., execute, bootstrap, etc.) in this location, so you must have write permission for the selected folder.

Execute the PsN Shell object
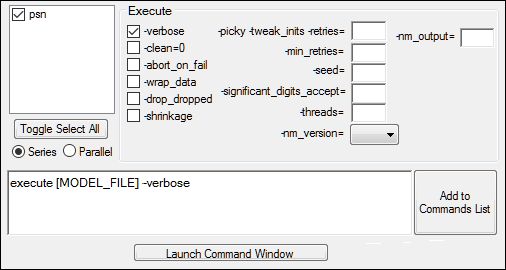
1. Select the Execute tab and build a command.
a. Make sure the psn checkbox is checked in the model list.
b. Check the -verbose box.
2. Press Add to Commands List.

3. Click ![]() (Execute icon) to execute the object.
(Execute icon) to execute the object.
This concludes the PsN Shell object setup and execution example. You may save the project or simply close it.