The PKS connection information must be provided before Phoenix can connect to PKS installations.
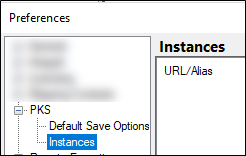
Select Edit > Preferences.
Click the (+) sign beside PKS and select Instances.
Press Add. The PKS Configuration dialog is displayed.
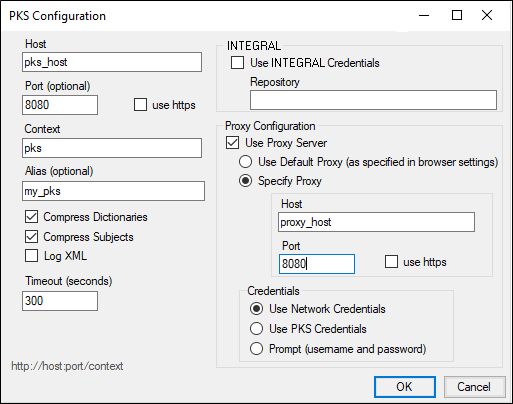
Enter the requested configuration properties.
Leave the Compress Subjects checkbox selected to improve performance by compressing study data per subject as it is transmitted to the PKS.
Clearing the Compress Subjects checkbox is only recommended for diagnostic purposes.
Selecting the Log XML checkbox is only recommended for diagnostic purposes.
To use your Integral login information, check Use Integral Credentials and enter the web location for the repository in the field.
To connect via proxy from the Phoenix PKS Plugin, configure the proxy information with the specific instance.
Check the Use Proxy Server checkbox.
If this checkbox is not checked, the controls inside the proxy configuration settings are disabled, and no proxy will be used.
Select Default Proxy or press Specify Proxy to enter the Host and Port information to access a different proxy.
Three Credentials or authentication methods are available for passing credentials to the proxy server. Select one of the credential methods:
Use Network Credentials: The system passes the credentials used to access the network.
Use PKS Credentials: The username and password specified for the PKS connection are passed to the proxy by the system. (Users who have also configured PKS with LDAP authentication may want to select this option.)
Prompt (username and password): The system prompts for the proxy username and password.
Press OK to save the new PKS instance.
Press OK to close the Preferences dialog.
Users can edit PKS instances after they are created. In the Instances page in the Preferences dialog, select a PKS instances and press Edit to edit it and Remove to remove it.
Users cannot edit or remove instances to which they are currently connected.