Study views define how to extract data from the PKS. Most commonly, views are specified to extract a subset of data (columns or rows) from the currently selected study. More complex views can be created to extract subsets of data from multiple studies.
Study views provide critical information necessary to reproduce datasets as they exist over time, and they provide for more granular status tracking of dependent analyses.
Select a study and click ![]() (New Study View icon).
(New Study View icon).
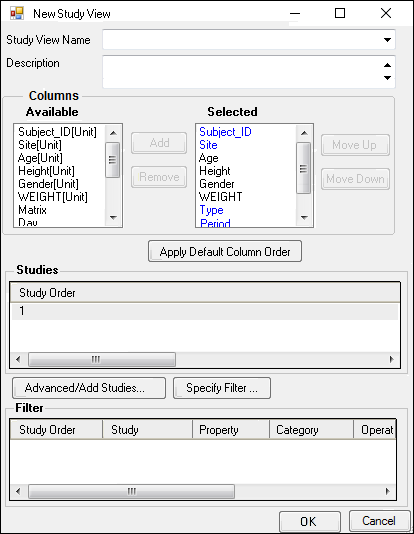
Type the study view name in the Study View Name field.
Specify the columns to include in the view and their order.
a. Select a column in the Available list and press Add to move the column to the Selected list for inclusion in the study view.
b. Press Remove to move the column back to the Available list.
c. Select a column in the Selected list and press Move Up and Move Down.
Press Advanced/Add Studies to add studies to the new view and adjust the column associations and settings.
a. Press Add Study to open the PKS Browser.
b. Select a checkbox beside one or more studies and press Select to add them to the study view.
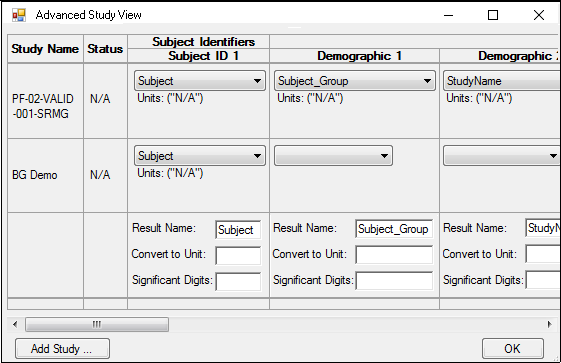
The new study information is displayed in the Advanced Study View dialog.
Depending on how the data source associated with a study is mapped, the following modifications can be made to columns mapped to four areas: Subject Identifiers, Subject Demographics, Data Collection Point, and Observations.
a. Use the menus in the Subject Identifiers, Subject Demographics, and Observations sections to change column mappings.
b. Enter a new result name in the Result Name field or accept the default name.
c. If a column has an associated unit, convert it by entering a conversion unit in the Convert to Unit field.
d. Enter a new significant digit value in the Significant Digits field or accept the default value.
e. In the Data Collection Point section, modify the nominal and relative time units, or leave the default settings.
Press OK to close the Advanced Study View dialog.
Press Specify Filter, which displays the Filter PKS Contents dialog.
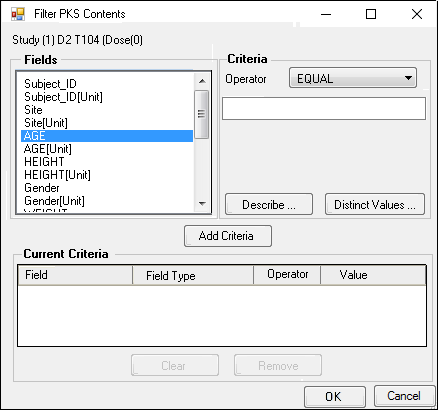
a. Select a field in the Fields list.
b. In the Operator menu, choose a boolean operator and enter the criterion in the Criteria field.
Or
a. Press Distinct Values to display all distinct values in the selected field.
b. Select a value and press Select to add the value to the Criteria field.
Then
a. Press Add Criteria to add the filter criteria to the Current Criteria list.
b. Press Describe to add a description in the Data Description window and press OK.
Press Clear to remove all filter criteria in the Current Criteria list or select a criterion and press Remove to remove only that criterion.
Press OK in the Filter PKS Contents dialog to save the filter criteria. The filter criteria are displayed in the Filter list in the New Study View dialog.
Press OK in the New Study View dialog to display the PKS Save dialog.
Enter an Audit Reason in the Audit Reason field and enter your password in the Password field.
Press OK to have the PKS process the new study view.