The Word Export tool allows users to export items, such as external and internal source worksheets, code files, images, results worksheets, results text, plots, Information tab text, and History worksheets, to a Word file.
To set up an export to a Word file
Select File > Word Export.
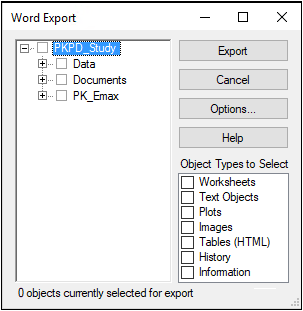
In the dialog, click the (+) signs next to Data, Code, or Workflow to expand each list.
Check the checkbox beside the project name to select all exportable items.
Or check the checkbox next to individual items to include them in the Word document.
Click Export to export the selected items to a Word document.
Click Options to display the Word Export Options dialog.
In the Document tab:
Choose the page orientation by selecting the Portrait or Landscape option button.
Check the Add source line to object box (the default) to include a source line stating the project, workflow, and object used to create each exported item.
In the Charts tab:
Check the Multiple charts per page box to export more than one plot per page.
In the Down and Across menus, select the number of rows of plots (Down) and columns of plots (Across) to display per page.
Check the Add page break box to add a blank page between each plot or grouping of multiple plots.
Check the Include both linear and log charts box to export linear and logarithmic Y-axes versions of plots.
Check the Start chart numbers at box to numerically label the charts. For example, Figure 1, Figure 2, etc. In the field, type the first number to use when labeling exported plots. The default is one.
In the Chart Format area, select the Export chart as metafile or Export chart as bitmap option button to choose the chart output format.
In the Workbooks tab:
Check the Start table numbers at box to numerically label the worksheets. For example, Table 1, Table 2, etc. In the field type the first number to use when labeling exported worksheets. The default is one. This option is ignored when exporting HTML tables created in Phoenix.
Check the Heading rows repeat box to have the worksheet column headers repeat on every new page.
Click Finished when all options are specified.
Click the checkbox of a particular type of object in the Object Types to Select list to select/deselect all objects of the specified type.
Click Export to export all selected items. The Word document is displayed when the export is finished.
