Setting JMS preferences
How to submit a job
Jobs Viewer
Merge results
Manage jobs within a project
Access Job Management configuration within Phoenix via the Preferences dialog (Edit > Preferences).
In the Preferences dialog, expand Remote Execution and select JMS.
Check the Remote Submit Enabled box.
If the checkbox is not checked, the Remote Execute icon in the Phoenix toolbar is present but disabled. When checked, the icon is enabled, allowing the user to send jobs to the JQS.
![]()
Job Management preferences
The Job Queue Server name (DNS Name or IP address), Port, and Protocol should be provided to you by you administrator.
In the Polling Interval field, enter how often you want your local client to sync up with the JQS.
In the RPS Queue Address field, optionally enter the fully qualified address of the RPS queue (e.g., http://myserver:8080/PhoenixServer).
JMS is intended to facilitate the off-loading of Phoenix processing to a remote source allowing the user to continue working as large and time consuming workflows are processed. These workflows and executable objects are later merged in to the originating Phoenix project.
To perform a remote execution of an object, click the Remote Execute icon and select Yes in the Remote Execution Confirmation dialog.
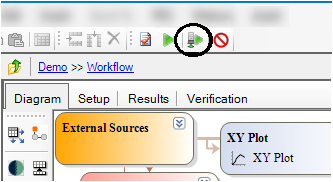
The Remote Execution icon is located in the Phoenix toolbar
The next dialog confirms successful submission to the remote Job Queue (JQS) of the job. Any executable that is not out-of-date or otherwise requiring executing cannot be submitted as a job.
If the remote machine cannot be reached, a dialog will display an error message and the locked objects will become unlocked.
Once the job is submitted, the user will not be permitted to make changes to any of the sources or dependents of the object(s) being executed. They are in read-only state so that changes that happen to the objects on the server can be merged into the project. The user can add new objects and multi-task within the project while the job is executing. The exception is if the root workflow of the project is submitted. Locked workflows do not allow insertion or deletion of executables.
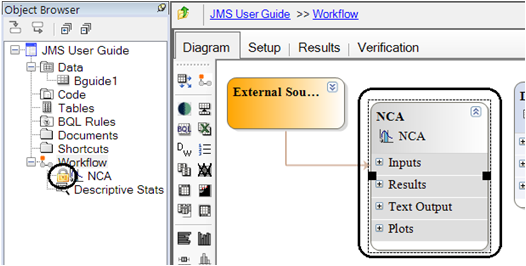
NCA has been submitted as a job, note the color in the diagram and the lock icon in the Object Browser
Viewing the history for any of the objects will reveal an entry showing that the object was executed remotely.

An entry in the history showing the remote execution of a Descriptive Statistics object
Note:Projects executed on the Job Management Service will report local times in the History for that object. If the Server and Workstation times are not in sync this could lead to events appearing to have occurred out of order. The system administrator should always attempt to keep all network participants time in sync.
A message in the Status Bar will notify the user once the remote execution completes. (Information also appears in the Status Bar when there is communication from the client to the JQS (e.g., sending job, receiving job results)).
The Jobs Viewer is used to monitor jobs as they are being processed, and to merge results back into projects. The user can carry on with other work and at a later time check on the Jobs Viewer accessed via the Window > View Jobs (CTL+J). The Jobs Viewer displays several properties of the jobs including:
Status: Displays where the job is in the processing flow. The typical ordering of the states is.
Submitted: Job is on the queue waiting to be processed.
Processing: Job is being processed by a Job Processing (JPS) node. In this state, there will be additional information letting you know what machine it is being processed on and how long it has been running.
Results in Queue: Job has finished processing and the results can be merged back into the original project.
Finished: Job was completed and results merged back into the project.
Canceled: Job was canceled by the user.
Project: The name of the project from which the job was submitted.
Submitted By: The username of the person who submitted the job.
Name: The name of the object submitted.
Source Project: The full path to the project from which the job was submitted.
Submit Time: The day, month, year, and time the job was submitted.
Processing Time: The length of computational time it took to complete the job.
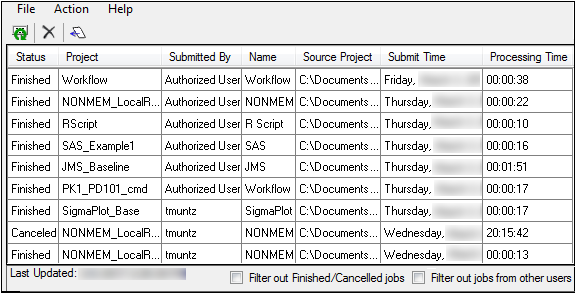
Jobs Viewer listing all jobs submitted to the JMS (no filtering)
The checkboxes at the bottom of the viewer enable quick filtering of the listed jobs (Filter out Finished/Canceled jobs or Filter out jobs from other users). By default, only jobs submitted by the current user that are actively executing are listed.
Job Viewer toolbar icons include:
 Cancel the execution. (A confirmation dialog will display.)
![]() Refresh of the viewer list.
Refresh of the viewer list.
![]() Merge a selected job.
Merge a selected job.
The RPS queue can also be accessed via the Jobs Viewer through the Action > View RPS Queue menu item.
Merging results requires that the user have the original project file, the project (or a copy of the project) is not currently opened in Phoenix, and nothing is currently executing.
When the submitted Workflow is at a Status of Results in Queue, click Merge (or select the Action > Merge menu item.)
In the Job Results Merge dialog, use the Keep project open after merge checkbox to indicate if the project remain open or be closed after merging. (The default is to keep it open).
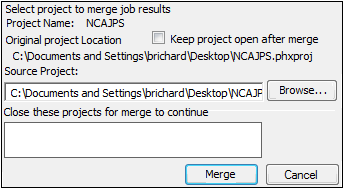
Job Results Merge dialog
Click Browse to select an alternate source project with which to reconcile the results.
If the source project, a project with the same name, or a project that has ID conflicts is already open in Phoenix, it is listed in the Close these projects for merge to continue area.
Click Merge to merge the results.
When the data merge is complete, the Job Results Merge dialog will close and the status of the merged entry will change to Finished.
Note:The results of a job can only be merged once.
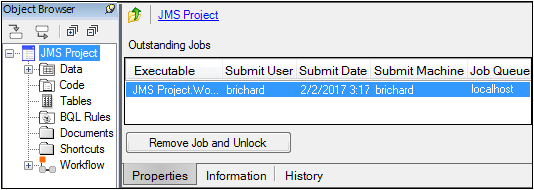
In the event of canceling a job, the project the job was sent from remains locked. In this scenario, you will need to remove the job from the project to unlock the locked objects. This is done from the project root's property panel.
 [
[
Properties panel of a project
Select the job to remove from the project and click Remove Job and Unlock.
This permanently removes the job information from the project and unlocks the objects. Only do this if you no longer wish to merge the jobs results back into the project. Once the project is saved this cannot be undone the deleted job will no longer merge into the project.
Note:You can only delete jobs that you have submitted from the JMS queue. Only the Admin has the ability to delete any job from the queue.
