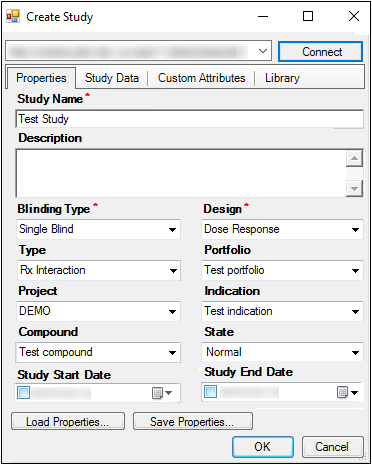
Properties can be entered once or saved for future use. Once a properties file has been saved, the file can be loaded during any study creation. Saving the properties file is helpful if multiple projects have the same properties or if you create a study in PKS from this project multiple times. The saved properties can be modified once they have been loaded.
This section covers the following topics:
Creating and Saving Properties to a file
Loading properties files
Creating and Saving Properties to a file
-
Load a Phoenix project file (*.phxproj) or create a new project.
-
Select PKS > Create Study.
-
If Phoenix is not already connected to PKS, click Connect and enter your login credentials in the Connect to PKS dialog.
-
In the Study Name field, type a study name.
-
Enter a description in the Description field.
-
Use the menus in the Create Study dialog to specify Blinding Type, Design, Type, Portfolio, etc.
A red asterisk (*) denotes a required study property. -
Click Save Properties to save the study properties.
-
In the Save As dialog, enter a file name and select a location in which to save the .map file.
-
Click Save to save the .map file.
-
Load a Phoenix project file (*.phxproj) or create a new project.
-
Select PKS > Create Study.
-
If Phoenix is not already connected to PKS, click Connect and enter your login credentials in the Connect to PKS dialog.
-
Click Load Properties to load a file with saved study properties.
-
In the Open dialog, select a .map file or a .pks file.
Phoenix WinNonlin study properties are saved as a .map file.
WinNonlin 5.3 study properties are saved as a .pks file. -
Click Open, which loads the study properties.

•If necessary, users can further modify study properties after the properties are loaded.
•Enter a new name or description in the Study Name and Description fields, or use the menus to modify study properties such as Blinding Type, Design, Type, etc.
