This section contains the following topics:
The Phoenix Licensing Service is the system Phoenix uses to manage user licenses. When a user starts Phoenix for the first time the Licensing Service is the first Phoenix service that is initialized, and a message is displayed that you are running an unlicensed version of the software, if no license is detected. The Licensing Service is integrated into the Phoenix Preferences dialog, which can be accessed by selecting Preferences in the Edit menu.
Users have several options to install or acquire a license. Users can activate their copy of Phoenix by using online and offline activation, or users can connect to a license server to acquire a license for online or offline use.
Phoenix requires the installation of a license key code. There are two types of license key codes:
-
Named User: a license key code that activates the software on (i) a single machine that may be accessed by the individual named end user for that license or (ii) a single host machine or server (“Host Server”) that may be accessed by any of the named end users as part of the license agreement. A Named User License means that only one named person can use each license and that named person has the right to unlimited access to the software. A Named User License is not based on concurrent users, but instead on an actual named user basis.
-
Commuter: a license key code that is retrieved from a network. Commuter licenses give users temporary offline authorization to use Phoenix while away from the network where their license server resides.
Commuter licenses can be used for a specified period of time and are subject to a hold time during which they cannot be checked out by another user. This protects users who need to make changes to a Phoenix project after they close Phoenix from immediately losing their license key to another user on the network.
Customers must work with Certara Sales and the Licensing Administrator to determine how many of their licenses should contain the commuter feature and the length of time that commuter enabled licenses are valid after they have been checked out from the license server. The time-out period cannot be altered after the license has been installed.
Note:The commuter license option is only available if the Sentinel™ RMS 8.x license server is used with Phoenix.
Product and authorization codes
A product code and an authorization code are included with each license or set of licenses purchased. The primary delivery system for acquiring the Phoenix application is downloading the installation files from a Certara server. Certara’s download and support page is located at https://support.certara.com.
When Phoenix is purchased, customers are sent an email with the four things necessary to use Phoenix:
•The application and license server download link.
•The authorization code.
•The product code.
•The license code generation Web site link.
Please include the product code in all correspondence with Certara about the product and its license, including license renewals, software updates, and product upgrades.
-
Run Phoenix as an administrator.
-
Select Edit > Preferences from the Phoenix menubar.
-
In the navigation panel, expand the Licensing node and select License Acquisition.
-
On the right side of the Preferences dialog, select the Online tab.
-
In the Online tab, click Test to check that you have access to the Authentication Server for online license activation. If the test is unsuccessful, go to "Offline activation".
-
Copy the entire authentication code given in the email.
-
In the Preferences dialog, paste the copied code into the step 2 text field and click the Activate button.
A verification pop-up confirming that the activation was successful. -
Click OK to close the pop-up verification.
-
In the navigation pane of the Preferences dialog, select the License Management node.
-
Verify that the correct license now appears. An example of a correctly installed local license is shown below:
•Right-click the Phoenix icon ![]() on the desktop and select Run as administrator.
on the desktop and select Run as administrator.
•In the User Account Control dialog, enter the administrator login information and click Yes.
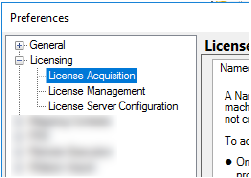


Note:If your machine does not have internet access, or if the Online Activation failed, refer to "Offline activation".
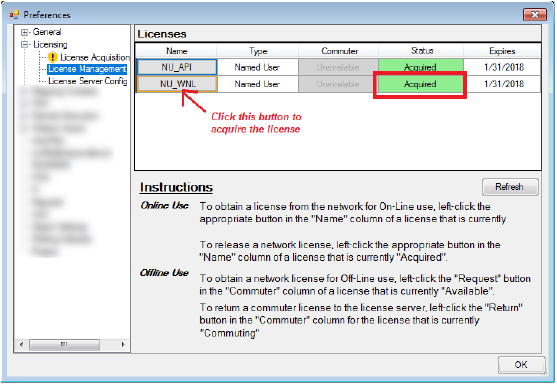
If the License Management window shows a successfully “Acquired” license, you are done with the license activation and are ready to use your Phoenix application.
Use either of the Options below to perform an Off-line License Activation:
Option 1:
-
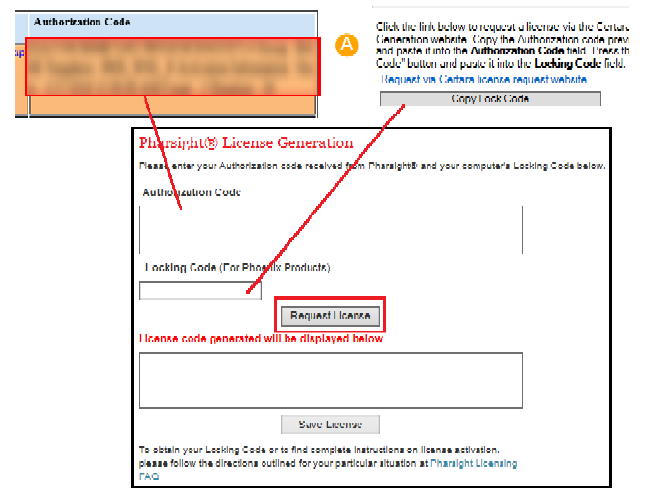
Login at: https://support.certara.com/login and then click the License Generation link.
-
Copy your Authentication Code (from the license email) and paste it into the web page.
-
Click the Copy Lock Code button in the Preferences dialog and paste the information into the Locking Code field in the web page.
-
Click Request License.
An example is shown below:
-
Copy the entire license code that is displayed in the bottom box.
-
Paste the license code information into the field in the Offline tab of the Preferences dialog.
-
Click Install to install the license you received through the website.
Option 2:
In the Offline tab of the Preferences dialog, click the Email Certara license administrator link to request instructions for an Offline activation. Include the following information in the email:
•Your System Lock Code (click the Copy Lock Code button in the Preferences dialog and paste the information into the email).
•Your order number from the Subject line of your license email (C-0xxxxx)
Certara Licensing will use the System Lock Code to make a license code for your machine, and email it back with instructions to do an Offline activation.
The License Management panel in the Preferences dialog allows users to see which license types are available and acquired.
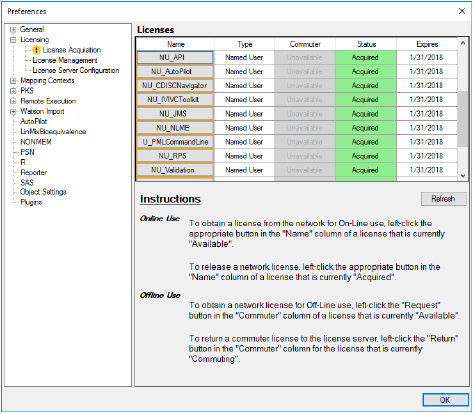
License Management preferences
The License Management dialog has five fields:
|
Field |
Function |
|
Name |
Lists the names of available licenses. |
|
Type |
Lists whether the license is a named user or named user server license. |
|
Commuter |
Lists licenses that are available to be commuted. |
|
Status |
Lists the status (Available, Acquired, etc.) of licenses |
|
Expires |
Lists the license expiration date. |
To use the License Management dialog
-
Select Edit > Preferences.
-
In the Preferences dialog, expand the Licensing node in the menu tree by clicking the (+) signs.
-
Select License Management.
There are no options for local named user licenses in the License Management screen.
-
To use a named user server license, click a license name in the Name column. The license status is changed to Acquired.
-
Click the license name again to return the license. The license status is now Available.
-
If a commuter license is available, click Request in the Commuter column. If the commuter license is acquired, its status is changed to Commuting.
The date the commuter license expires is listed in the Expires column. -
To return a commuter license, click Release to release the license.
-
Click Refresh to update the list of available licenses.
The License Server Configuration panel allows users to add license server IP addresses to Phoenix. The number of available license servers is determined by the customer. Some versions of Sentinel license servers support redundant license servers.
The License Server Configuration panel has three fields: Name, IP Address, and Status. The Name field contains the name of the license server, the IP Address field contains the IP address of the license server, and the Status field contains the connection status.
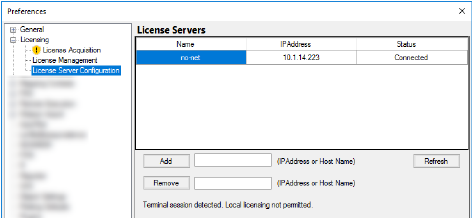
License Server Configuration panel
To use the License Server Management screen
-
To add a license server, enter the IP address of the server in the IP Address or Host Name field and click Add.
-
To remove a license server, enter the IP address of the server in the IP Address field and click Remove.
-
To update the list of available license servers, click Refresh.
