Edit a group in the system database
-
Click
 in the toolbar.
 -
Click
 above the list to show existing users.
 -
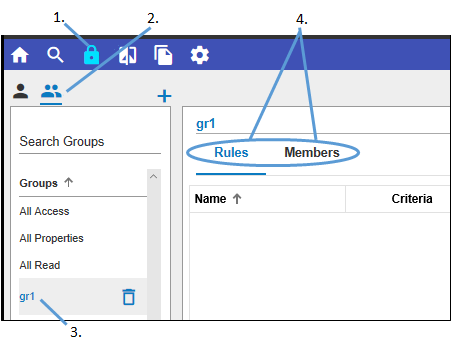
Select a group to edit from the list.
-
Toggle between the Rules and Members tabs in the right panel.
-
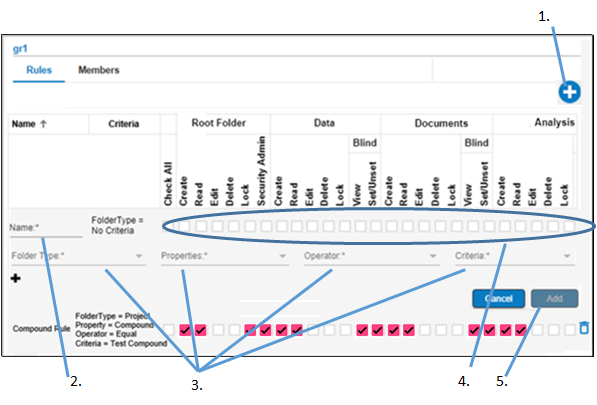
In the Rules tab, to add a rule, click
 .
.
To view or edit a rule, click the rule name. -
In the expanded area, enter or edit the Name for the rule.
-
Define the rule criteria by selecting the Folder Type, a Property, an Operator, and a Criteria from the respective menus.
To add more criteria to the new rule, click and repeat the selections of Folder Type/Property/Operator/Criteria.
 -
Check on/off the box(es) to define the permissions to grant the group when the rule criteria are met. The permissions are grouped into 4 categories, according to the security context (assigned when the folder type was created): Root Folder, Data, Library, and Experiment. For each of the categories, permissions can be set to allow a group to:
-
Click Add to save the new rule or Apply to accept the modifications to the existing rule.
Create folders
Read the contents of the folder
Edit the contents of the folder
Delete the folder and its content
Lock the folder or files in the folder
View the folder contents even when blinded in a study
Set the folder or files to be blinded in the study
As an example, a rule is defined that, for all folders of the “Project” type, that have the “Therapeutic area” property “equal” to “Cardiovascular,” Read and Edit permissions of Documents will be granted to members of the group. This means that a user who is a member of the group for which this rule is defined, will be able to read and edit documents that are located in Cardiovascular-related projects. Refer to “Example of setting up permissions for a external partner on a project” for another example.
To delete a rule, click ![]() to the far right of the rule.
to the far right of the rule.
-
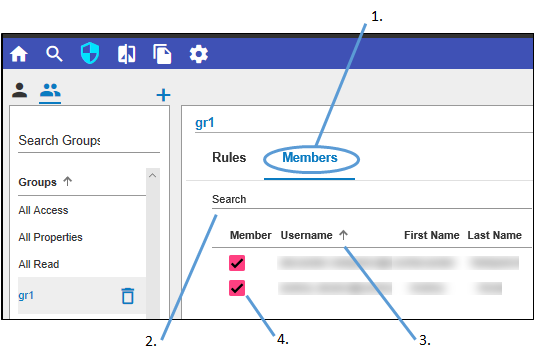
With the desired group selected in the list on the left, select the Members tab on the right.
-
To search for a member, type the name in the Search area above the list on the right.
-
To sort the list of members, click a column header. Click the column header multiple times to switch between ascending, descending, and no sorting.
-
To add a user to the group, check the corresponding box. To remove a user from the group, uncheck the corresponding box.
The list on the right shows all the users in the directory, but only the checked ones have access to the selected group.
