Save a Phoenix Project to Integral Example
This example requires WRITE or higher system access to Integral and installation of Phoenix on the client machine. In this example, a new project will be created in Integral and the Phoenix NCA example project will be saved as an experiment within that new project.
-
Start Phoenix.
-
If needed, configure your Integral settings:
-
Click Edit > Preferences and then click the (+) sign next to Integral.
-
Click Instances and then click the Add button, which opens the Integral Configuration dialog box.
-
Type the requested configuration settings and then click OK, which enables Phoenix and Integral to communicate.
-
Click OK again to close the Preferences dialog box.
Ask your system administrator if you are do not have the requested settings. -
Load NCA.phxproj from the Examples\WinNonlin folder in your Phoenix installation director.
-
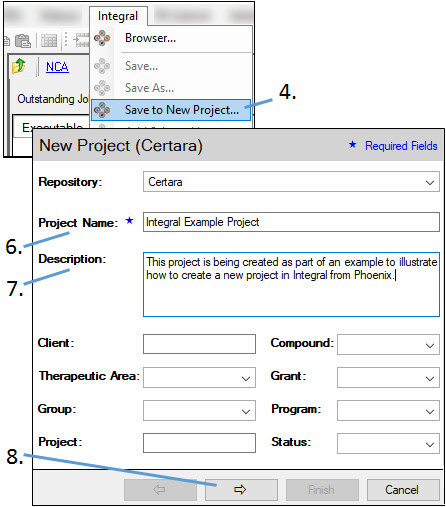
Choose Integral > Save to New Project from the Phoenix menu.
-
Enter your Integral login credentials and click OK.
-
In the New Project dialog, enter Integral Example Project in the Project Name field.
-
For the Description, type:
This project is being created as part of an example to illustrate how to create a new project in Integral from Phoenix. -
Click
 .
. -
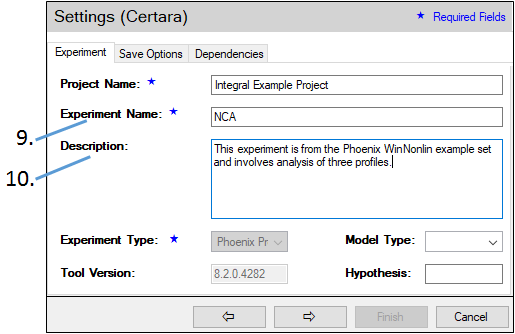
In the Settings page, enter NCA for the Experiment Name.
-
In the Description field, type:
This experiment is from the Phoenix WinNonlin example set and involves analysis of three profiles. -
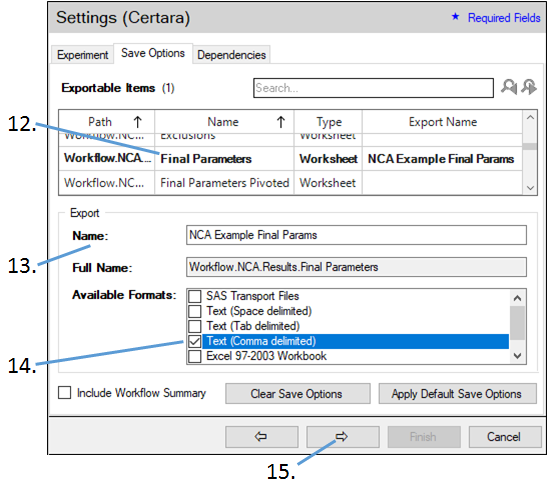
Click the Save Options tab at the top.
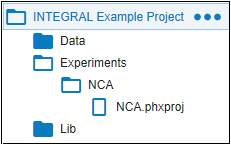
With the options set so far, the Integral Example Project will have one folder in the Experiments folder called NCA and within that folder will be a single Phoenix project file called NCA.phxproj. -
Scroll down the list of Exportable Items and select the Workflow.NCA.Results path Final Parameters row.
-
In the Name field, type NCA Example Final Params.
-
Check the Text (Comma delimited) box to export the final parameters in CSV format.
Multiple formats can be checked. A file will be generated for each checked format. -
Click
 .
. -
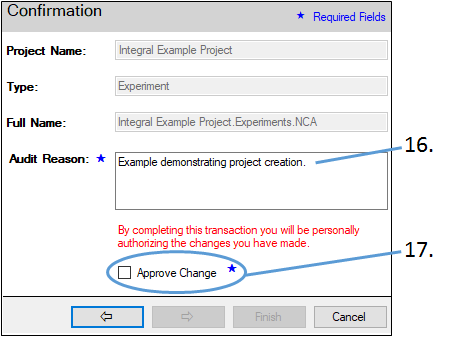
In the Audit Reason field, type:
Example demonstrating project creation -
Check the Approve Change box.
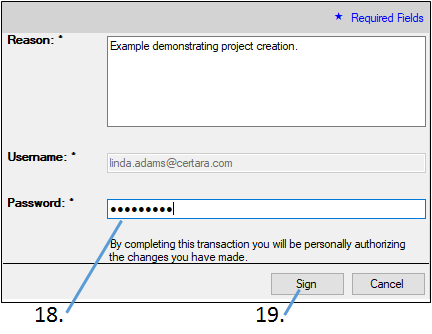
This action displays the Electronic Signature dialog. -
Type your password in the Password text box.
-
Click Sign.
-
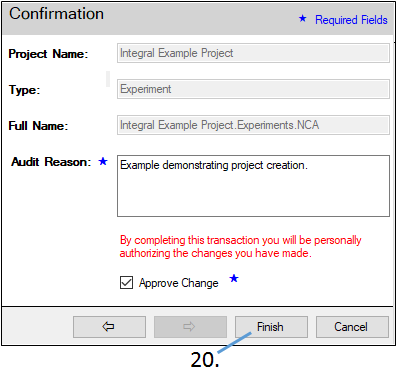
Click Finish.
The project is saved to Integral.
Using the Save Options tab, items that are part of the NCA.phxproj file can be exported as separate files. These separate files could then be copied to a different location, such as another experiment or project. For this example, export the Final Parameters worksheet.
At this point the Confirmation dialog is redisplayed. If all required fields are filled in correctly, the Finish button will be active. If it is not, use the  button to review the entries.
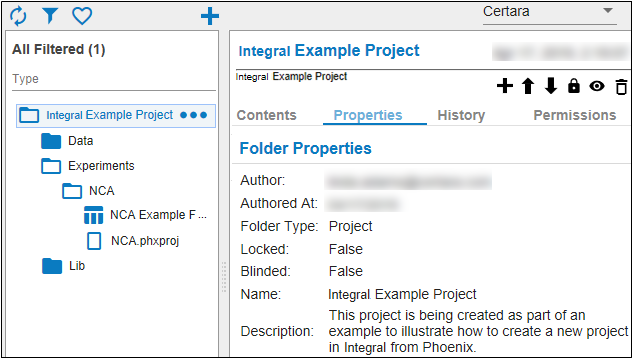
Viewing the project in Integral
It is now possible to view the new project in the Integral Web Client.
-
Open a Web browser.
-
Enter the URL of the Integral example database in the Address field of the browser.
-
At the Sign In screen, type your Integral user name and password and click Sign In.
-
Scroll down the list on the left or click the
 button to use the filter tool to locate the new folder.
 -
Select the Integral Example Project folder, then expand the Experiments and then NCA subfolders to view the contents.
-
When finished, click your username at the top right of the web page and select Logout to disconnect from Integral.