Publish allows you to connect to certain EDMS systems inside Publish, allowing documents to be pulled from the DMS without leaving the program. Currently, GlobalSubmit supports local shares, Amazon S3 buckets, SharePoint 2010 and 2013 shares, Documentum, and Veeva. Adding these DMS shares through Publish is a simple and quick process.
This next section will take you through the steps to configure and use the DMS trees.
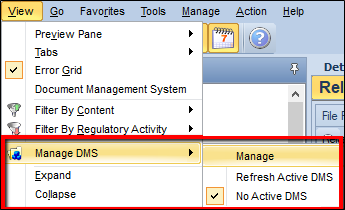
Select View > Manage DMS > Manage.
This will bring you to the Manage Screen. Click New to add the configurations required to connect to the DMS system.
Select the type of DMS System.
Local allows you to connect to a drive from your computer. To configure a path that is on a network drive or on the local computer, enter the computer path in the text box and click OK.
Amazon, SharePoint, Documentum, and Veeva will require a URL to access the site, and may also require credentials to access the shared drive. Use the Test Connection button to verify that Publish can reach the path with the supplied path and credentials. A message is provided stating if the connection was successful or not.
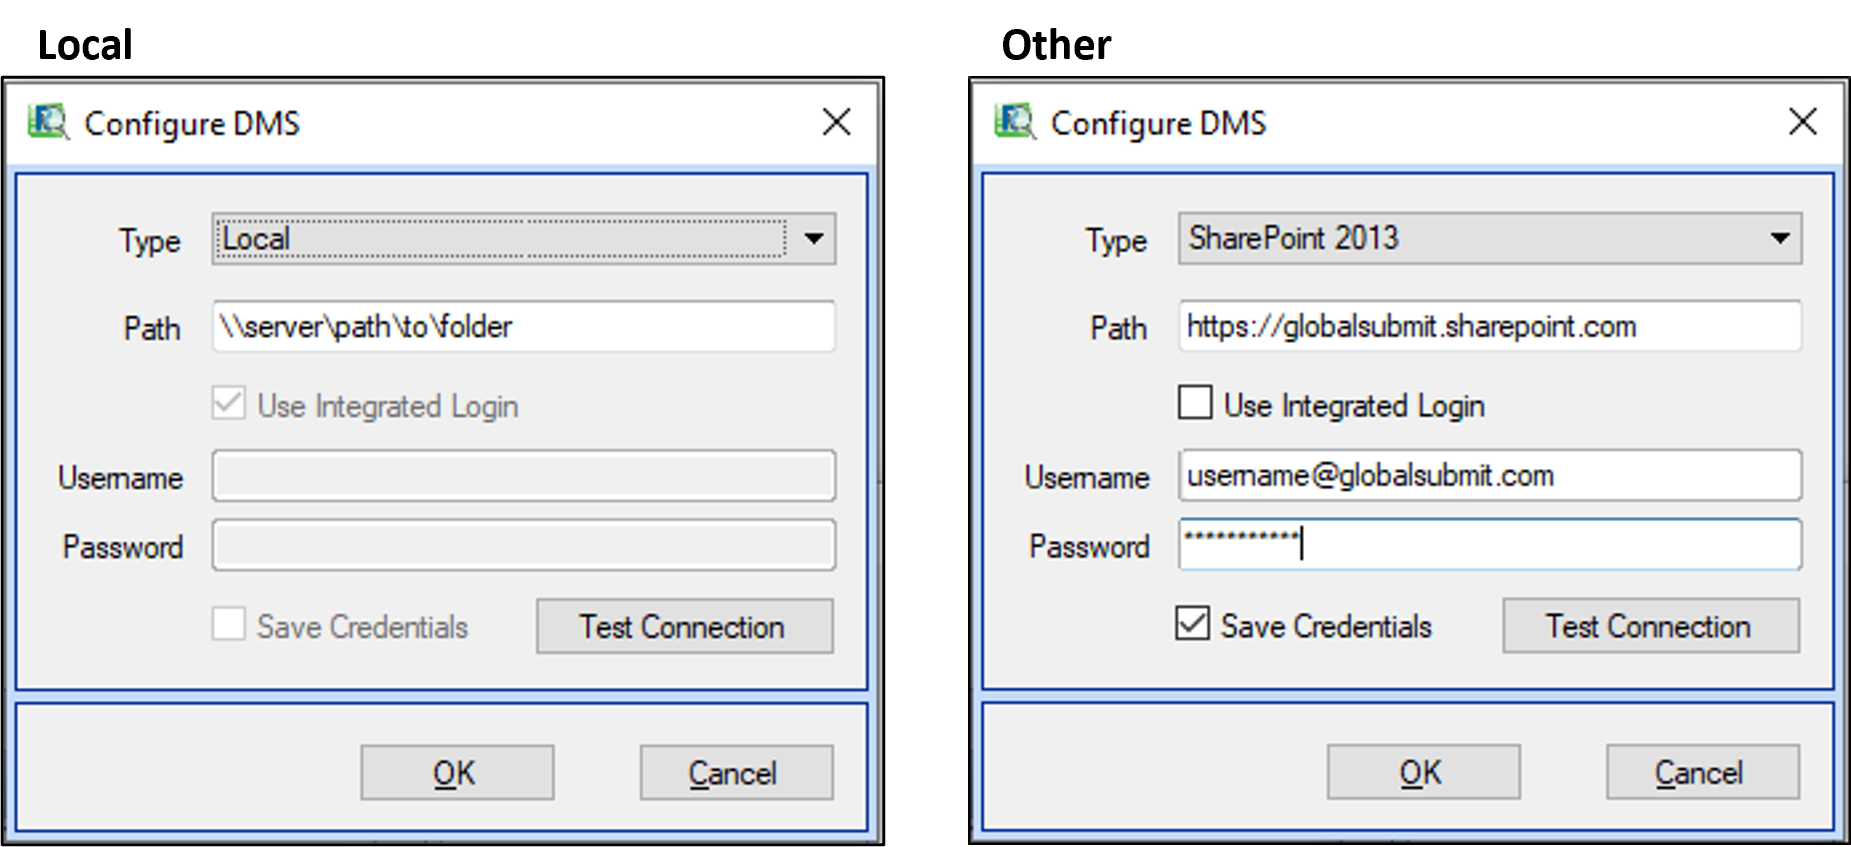
When OK is selected, you will be prompted to enter a name for the DMS connection.
At this point, the DMS configuration can be activated by selecting the DMS name and clicking Active, then OK. Once activated, the DMS will show in bold.
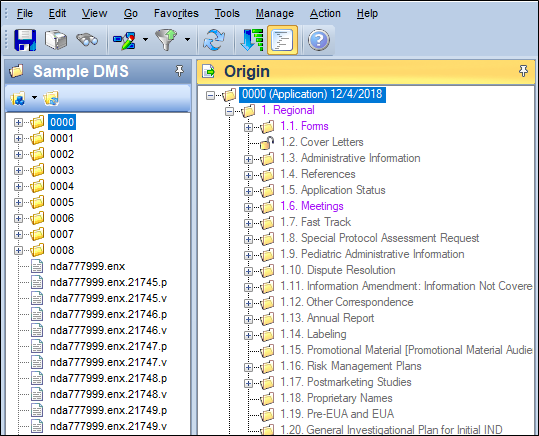
Files can now be dragged and dropped directly from DMS pane into the eCTD tree.
Dragging and Dropping
You can drag and drop files from Windows Explorer or the previously mentioned DMS pane to a table of contents heading in the tree view, or into the details grid with the TOC heading selected in the Navigation pane.
To add a document to the tree, select one or more files from the DMS pane or Windows Explorer and drag the files over the desired location in Publish and drop them.
The documents will now appear under the selected heading. If you drag and drop a file over an existing file reference the File Actions window is displayed.
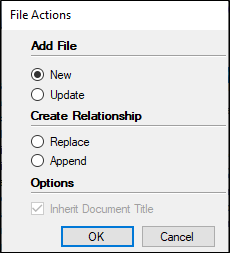
New – Adds the file reference into the same section as the pre-existing file.
Update – Replaces the pre-existing file (this is different from applying the Life Cycle operator of “Replace”).
Append – Uses the Life Cycle operator of “Append”. This option is available only when publishing in Life Cycle or Current views.
Replace – Uses the Life Cycle operator of “Replace”. This option is available only when publishing in Life Cycle or Current views.